Quick Answer: Wall Mounted Shoe Rack Specs & Mounting
A wall-mounted shoe rack is an elevated storage assembly that suspends footwear directly from vertical wall framing rather than resting on the floor. Built from tubular powder-coated steel, extruded aluminum rails, or hardwood slats, these units project only 6 to 12 inches from the wall to preserve essential hallway walking clearance. Secure installation requires anchoring into solid wood wall studs using 2 to 1/2-inch #10 wood screws or heavy-duty 3/16-inch steel toggle bolts to support dynamic loads of 60 to 120 pounds.
Key Takeaways for Hallway Planning
- Floor Elevation Benefits: Lifting shoes 8 to 10 inches off the floor allows robot vacuums and wet mops to pass unimpeded while eliminating dirt pileups.
- Stud Anchoring Rule: Never rely on cheap plastic drywall plugs for multi-tier racks; always fasten brackets directly into solid 2×4 wood studs or use steel toggle anchors.
- Vertical Tier Spacing: Space tiers 7 to 8 inches apart for low sneakers, 10 to 12 inches for mid-top boots, and reserve top tiers for tall footwear.
- Hallway Egress Clearances: Choose low-profile slanted shelves projecting under 8 inches in narrow 36-inch residential corridors to avoid shoulder bumps and code violations.
Every busy home experiences the entryway bottle-neck. Family members kick off running shoes, heavy work boots, and casual slides right at the doorway, creating a hazardous obstacle course. Freestanding shoe racks take up valuable floor space, trap dust bunnies underneath, and get kicked around during daily traffic.
Installing a dedicated wall mounted shoe rack permanently transforms your entryway, mudroom, or closet corridor. By mounting your shoe storage directly to wall framing, you reclaim entire square feet of usable floor area. Footwear stays elevated, organized by family member, and properly ventilated so damp athletic shoes dry quickly.
However, supporting dozens of pounds of footwear on vertical drywall requires careful structural planning. Shoes create cantilevered torque that pulls outward on wall anchors every time someone grabs a pair. Let us examine the four primary rack designs, stud fastening mechanics, tier spacing formulas, and egress safety codes.
The 4 Primary Types of Wall Mounted Shoe Racks
Wall shoe storage systems come in distinct structural formats tailored to hallway width, aesthetic preferences, and shoe styles. Selecting the correct build type prevents hallway crowding and sagging shelves.
1. Slanted Metal Wire & Tubular Steel Racks
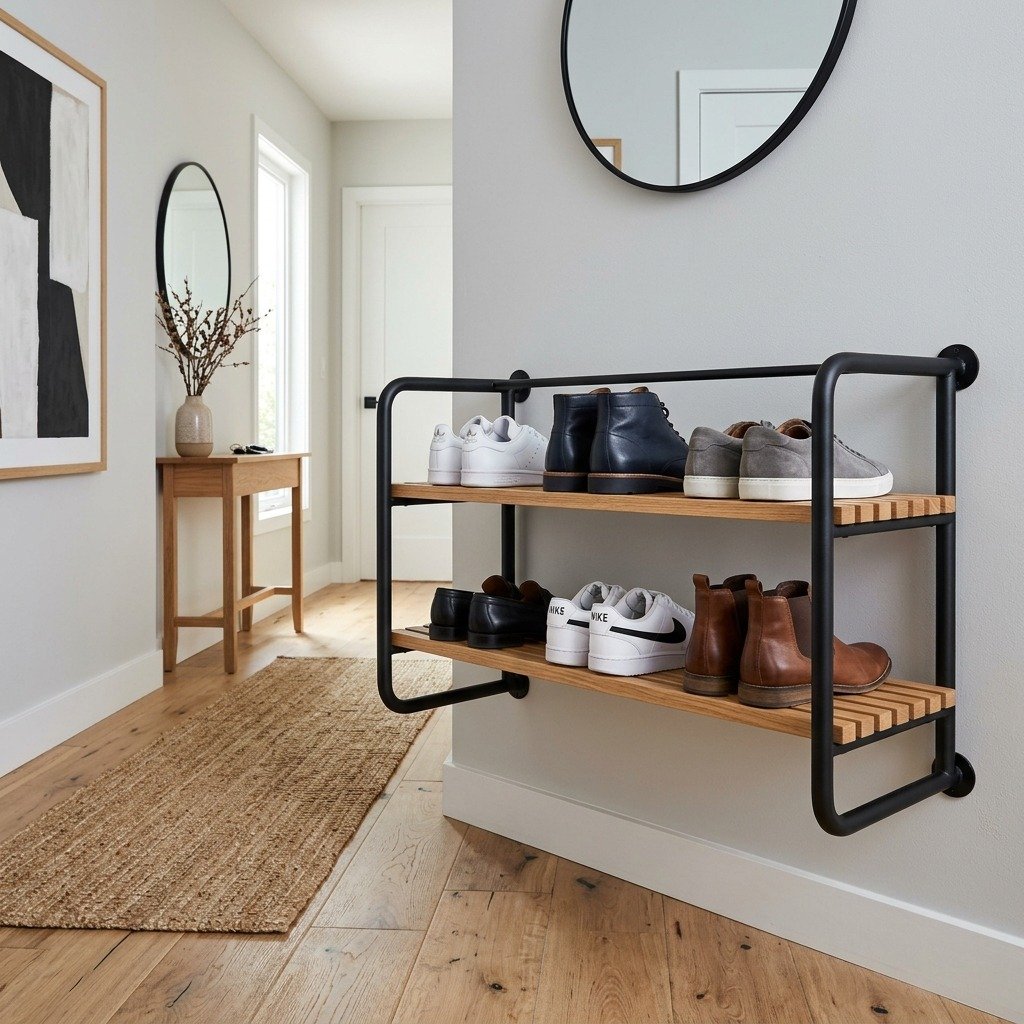
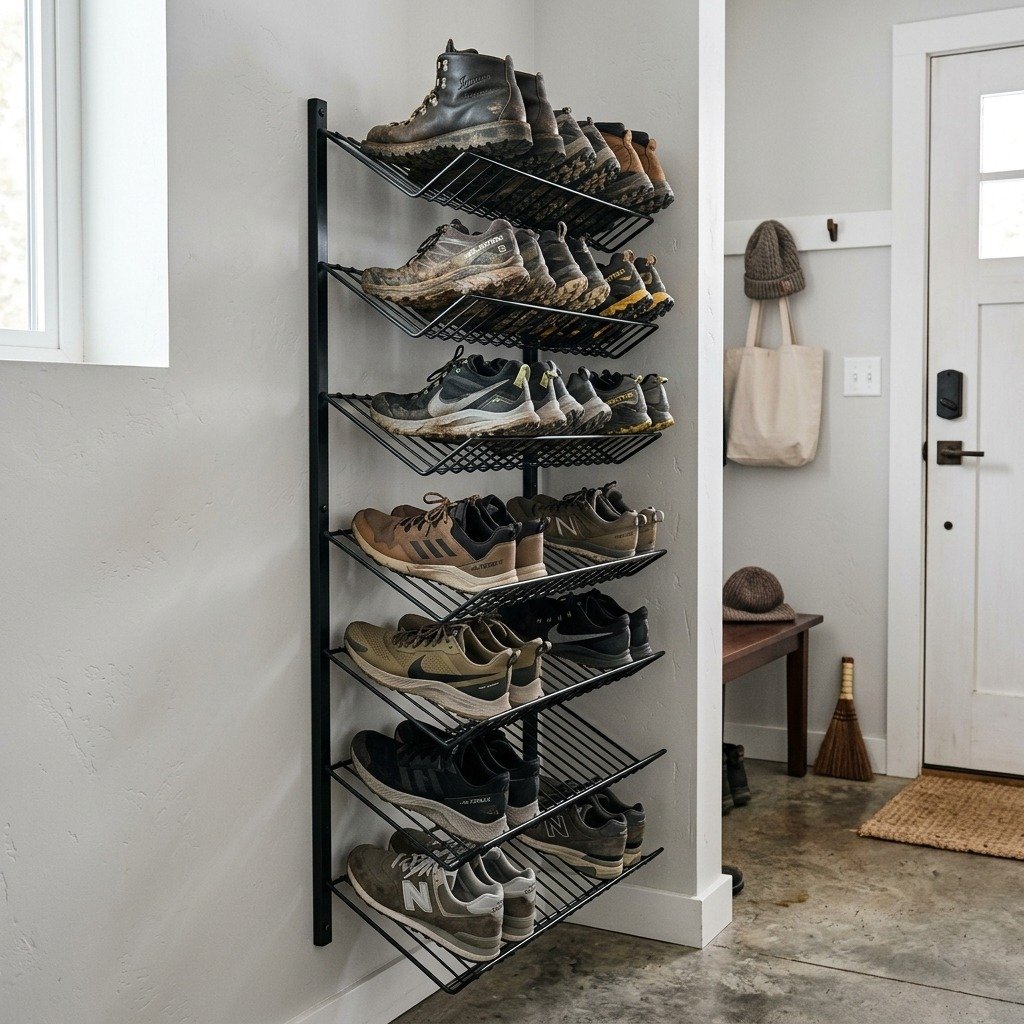
Slanted metal wire racks position shoes at an aggressive 30-degree to 45-degree downward angle against the wall. A front retaining lip holds the shoe soles in place while the heels rest against an upper crossbar. Fabricated from powder-coated tubular steel or heavy-gauge welded wire grid, these units resist moisture and road salt.
The primary advantage of slanted wire designs is an ultra-slim wall projection of just 6 to 8 inches. This compact depth makes them the superior choice for tight entryway passages and narrow laundry room walls. Open wire mesh also lets melted snow and dried mud fall through rather than pooling under leather soles.
2. Floating Horizontal Slat & Solid Wood Shelves
Floating horizontal shoe shelves use solid hardwood planks, Baltic birch plywood, or metal tray channels mounted perpendicular to the wall. Shoes sit flat in standard resting orientation, just like on retail display shelving. These units frequently feature rear metal brackets concealed inside routed shelf mortises.
Floating shelves deliver a clean architectural appearance that blends into modern residential decor. However, because shoes sit completely flat, horizontal shelves require a deeper wall projection of 11 to 13 inches. They work best in open foyer alcoves or dedicated mudrooms with at least 42 inches of corridor width. Compare horizontal dimensions in our shoe rack entryway sizing guide.
3. Minimalist Dual-Rod Heel-Catch Racks
Dual-rod friction racks consist of two parallel horizontal steel or brass rods mounted directly to the wall on cast brackets. The front rod sits slightly lower than the rear rod, suspending shoes by the front edge of their heels. The shoe hangs diagonally downward along the wall surface.
This minimalist hardware system creates an almost invisible floating effect while consuming minimal wall depth. It works exceptionally well for high heels, athletic runners, and formal shoes with pronounced heels. However, it cannot accommodate flat sandals, flip-flops, or wedge soles that lack a distinct heel ledge. Explore steel rack designs in our metal shoe rack buying guide.
4. Wall-Mounted Drop-Front Shoe Cabinets
Wall-hung shoe cabinets combine floating wall brackets with enclosed tilt-out plastic or wooden drawers. When closed, the cabinet looks like a slim floating credenza projecting only 7 to 9 inches into the room. Tipping the drawer forward reveals two tiers of vertical shoe compartments.
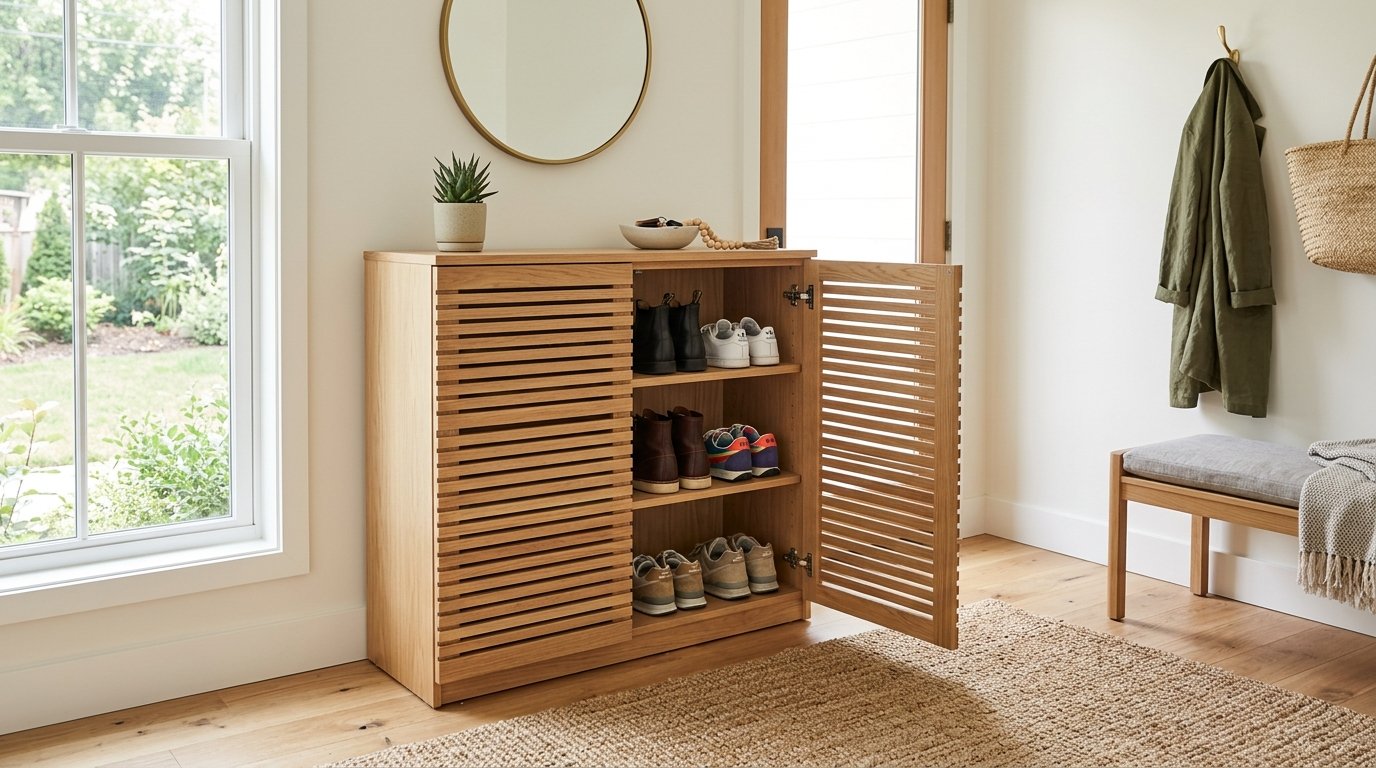
Drop-front cabinets keep cluttered footwear completely hidden from view, making them popular for formal front entryways. Because the cabinet floats off the baseboard, your hallway floor appears spacious and easy to clean. Compare enclosed cabinet ventilation in our shoe rack with doors guide.
Comparison of Wall Mounted Shoe Storage Types
Review this side-by-side technical breakdown to compare projection depths, weight limits, and installation specs:
| Rack Design | Wall Projection | Weight Capacity | Ideal Placement | Typical Price |
|---|---|---|---|---|
| Slanted Tubular Steel Wire | 6 to 8 Inches | 60 to 90 lbs | Narrow hallways, mudrooms, closets | $45 to $95 |
| Floating Hardwood Shelves | 11 to 13 Inches | 80 to 120 lbs | Wide foyers, walk-in closets, bedrooms | $70 to $160 |
| Minimalist Dual-Rod Friction | 5 to 7 Inches | 30 to 50 lbs | Behind doors, small studio apartments | $35 to $75 |
| Wall-Hung Drop-Front Cabinet | 7 to 9 Inches | 50 to 80 lbs | Formal entryways, clean aesthetic zones | $110 to $240 |
| Heavy Garage Boot Grid | 12 to 15 Inches | 150 to 250 lbs | Garages, workshops, utility rooms | $85 to $180 |
Stud Anchoring & Fastener Engineering
Wall storage systems must satisfy safety standards published by the Consumer Product Safety Commission furniture anchoring guidelines and structural durability benchmarks from the ANSI/BIFMA storage safety standards. When an assembly holds 12 pairs of athletic shoes or heavy leather winter boots, dynamic weight reaches 40 to 70 pounds.
Every time someone pulls a shoe off a shelf, cantilevered torque applies outward tension to top fasteners. Understanding the structural differences between stud mounting and hollow-wall anchors is crucial:
1. Solid Wood Stud Fastening (The Gold Standard)
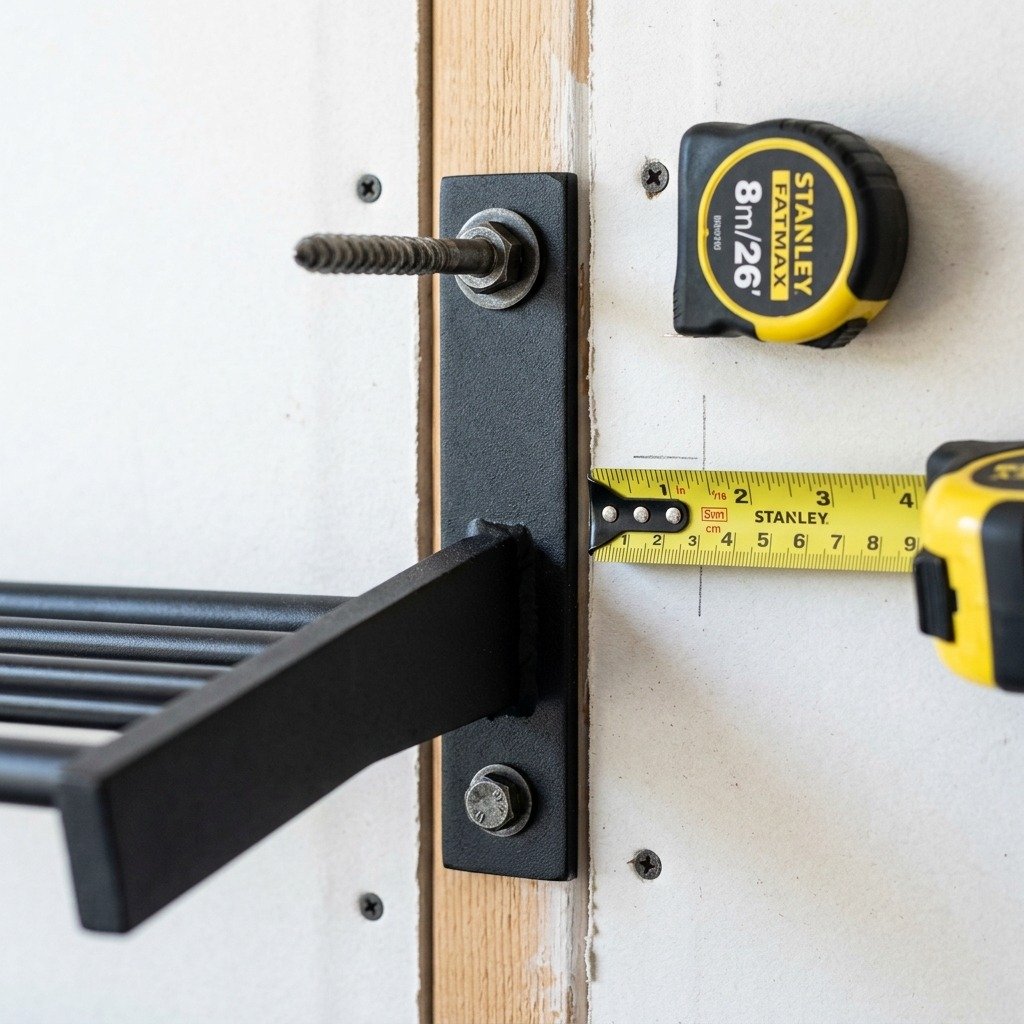
Residential interior walls feature vertical 2×4 wood studs spaced 16 inches or 24 inches on center. Driving screws directly into the center of wood studs provides immense pullout resistance (over 200 pounds per screw).
Use minimum 2 to 1/2-inch to 3-inch #10 or #12 wood screws with wide pan heads or flat washers. Drive screws through the mounting bracket, through the 1/2-inch drywall layer, and at least 1 to 1/2 inches deep into solid wood. Pre-drill pilot holes using a 1/8-inch drill bit to prevent splitting dry framing lumber.
2. Hollow-Wall Steel Toggle Bolts (When Studs Do Not Align)
Frequently, your desired entryway placement does not align symmetrically with hidden wall studs. In hollow drywall sections, never trust standard plastic ribbed expansion anchors. Plastic anchors quickly loosen under the repetitive downward pulling force of loaded shoes.
Instead, install 3/16-inch or 1/4-inch spring-wing steel toggle bolts or strap toggles. A heavy-duty steel toggle distributes clamping pressure across the solid gypsum core behind the drywall, safely holding 50 to 75 pounds of shear force per attachment point.
Ergonomic Tier Spacing, Height & Clearance Formulas
Mounting your rack at the proper ergonomic height ensures comfortable daily reach while maximizing floor clearance. Follow these established installation dimensions:
1. Vertical Tier Spacing Rules
Adjusting the gap between tiers prevents crushed shoe collars and wasted vertical space:
- Low-Top Sneakers & Flats: 7 to 8 inches of vertical tier clearance comfortably accommodates running shoes, loafers, and tennis shoes.
- Mid-Top Footwear & Ankle Boots: 10 to 12 inches of tier clearance provides ample headroom for high-top sneakers, Chelsea boots, and low hiking boots.
- Tall Work & Winter Boots: 16 to 18 inches of clearance is required for knee-high equestrian boots or insulated snow boots, which should occupy the topmost shelf or a dedicated bottom hook rail.
2. Baseboard & Floor Clearances
Mount the lowest shelf at least 8 to 10 inches above the finished floor surface. This vertical gap leaves ample room for automated robot vacuums, brooms, and wet mops to slide underneath without disturbing your footwear. It also keeps bottom shoes safe from puddling snowmelt during winter.
3. Corridor Walking Width & Egress Codes
Building safety codes established under the OSHA general industry walking-working surfaces standards mandate maintaining clear unobstructed passageways. In residential hallways, standard building codes require at least 36 inches of clear path.
If your hallway measures exactly 36 inches wide, choose an ultra-slim slanted rack projecting no more than 6 to 7 inches. Installing a bulky 14-inch horizontal rack in a tight corridor will snag coats, bruise hips, and violate residential egress standards. For heavy mudroom boot options, check our garage shoe rack guide.
Step-by-Step Wall Mounted Shoe Rack Installation
Mounting a multi-tier rack takes approximately 45 minutes with basic homeowner tools. Follow this structured five-step installation sequence:
Step 1: Locate and Mark Wall Studs
Run an electronic stud finder horizontally across your installation area. Mark the left and right edges of each stud, then draw a vertical center line. Tap a small finishing nail through the drywall to confirm solid wood framing.
Step 2: Establish Level Baseline
Determine your lowest shelf height (typically 10 to 12 inches above the floor). Place a four-foot bubble level or laser level horizontally across your marks, and draw a reference baseline across the wall.
Step 3: Pre-Drill Pilot Holes
Hold the mounting uprights or wall brackets against the wall aligned with your stud centers. Use a center punch to indent the screw locations. Drill 1/8-inch pilot holes at least 2 inches deep into the wall studs.
Step 4: Fasten Structural Uprights
Drive 2 to 1/2-inch #10 wood screws through the bracket mounting holes into the wood studs using an impact driver. Keep the screws slightly loose until you check vertical plumb with a torpedo level, then torque them down securely.
Step 5: Lock Tiers and Test Load
Attach the horizontal shelves or slanted wire tiers to the vertical uprights. Apply downward hand pressure on each tier to verify absolute structural rigidity before loading your shoe collection. Compare seating bench integration in our shoe rack bench buyer guide.
5 Costly Wall Mounted Shoe Rack Mistakes to Avoid
Avoid ruined drywall and frustrating installations by steering clear of these common homeowner errors:
- Relying on Conical Plastic Drywall Anchors: Conical plastic anchors pull straight out of gypsum when loaded with 8 pairs of heavy winter boots. Always anchor to studs or heavy steel toggles.
- Ignoring Muddy Sole Drainage: Installing solid wood shelves directly beneath wet footwear causes moisture rings and wood warping. Use wire grids or washable silicone drip liners on upper shelves.
- Mounting Too Close to Door Swings: Hanging a rack directly behind an entry door without checking the swing clearance will cause the door handle to smash into shoe racks.
- Forgetting About Robot Vacuums: Mounting the bottom tier just 3 inches off the ground traps your robot vacuum cleaner. Maintain at least 8 inches of ground clearance.
- Overloading Cantilevered Brackets: Never stack heavy toolboxes or gym dumbbells on lightweight wire shoe tiers designed strictly for footwear.
Frequently Asked Questions About Wall Mounted Shoe Racks
How much weight can a wall mounted shoe rack hold?
A wall mounted shoe rack anchored directly into solid 2×4 wood studs holds between 60 and 120 pounds, depending on the bracket gauge and shelf material. Units mounted into hollow drywall using steel toggle bolts hold between 40 and 60 pounds total load.
How high off the floor should a wall shoe rack be mounted?
The bottom tier of a wall mounted shoe rack should sit 8 to 12 inches above the finished floor surface. This elevation provides enough clearance for mops and robot vacuums to pass underneath while leaving upper shelves at convenient arm height.
Can you mount a shoe rack on drywall without studs?
You can mount a shoe rack on drywall without studs by using 3/16-inch or 1/4-inch heavy-duty steel toggle bolts. Avoid standard plastic push-in anchors, as the repetitive pulling force of removing shoes causes plastic anchors to pull free from gypsum board.
What is the minimum hallway width for a wall shoe rack?
Residential hallways require a minimum clear walkway of 36 inches under building egress codes. In a standard 36-inch wide hallway, choose an ultra-slim slanted shoe rack projecting no more than 6 to 8 inches to ensure a safe 28-inch walking corridor.

Written by Callum Langham
Callum Langham is a professional storage systems installer and workshop structural consultant with over 14 years of commercial and residential job-site experience. He specializes in load calculation engineering, concrete mechanical anchors, heavy shelving safety, and workshop space planning across North America.