Quick Answer: SafeRacks Storage Bin Rack Selection & Sizing
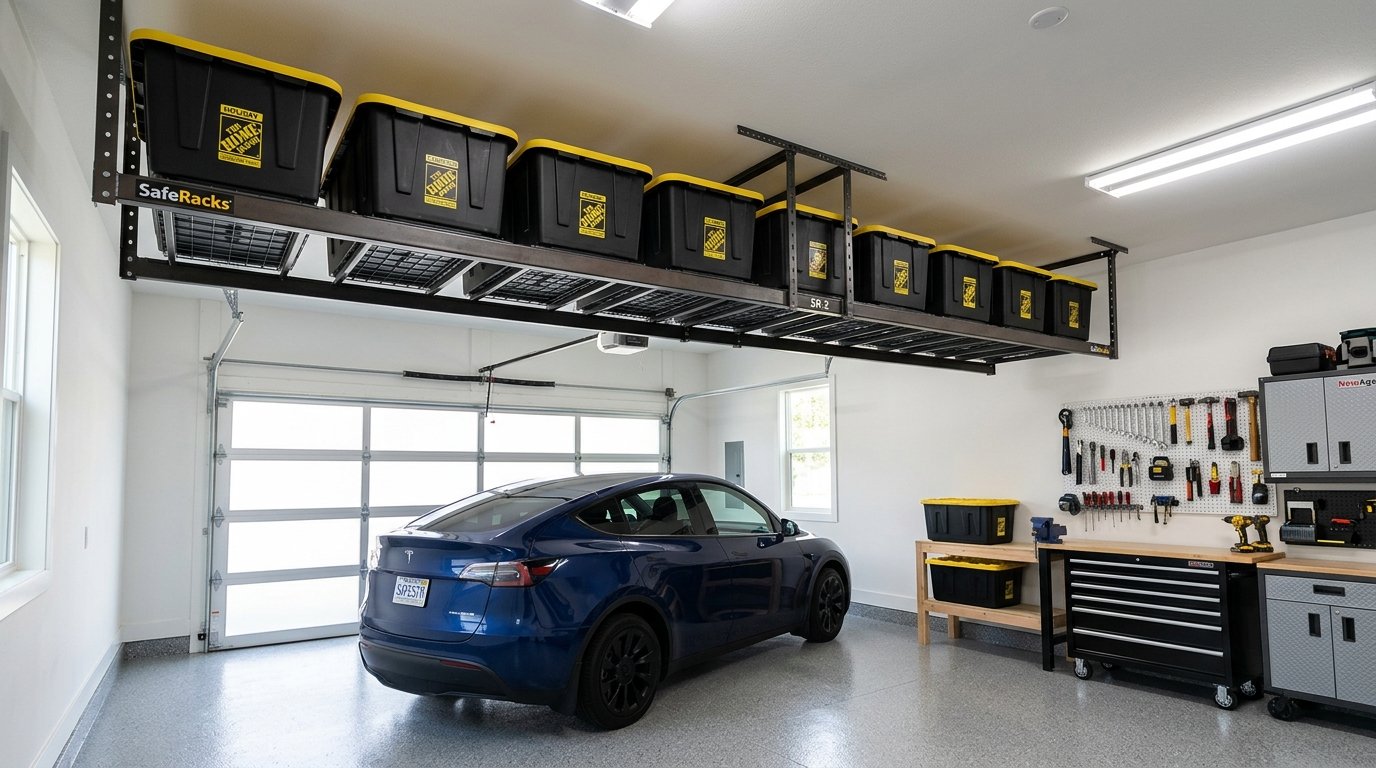
The SafeRacks storage bin rack is an overhead ceiling-mounted sliding rail system engineered specifically for heavy-duty 27-gallon tough storage totes (such as Home Depot Commander, Lowe’s Tough Box, and Costco Greenmade). Unlike flat wire platforms where totes must be stacked on top of one another, the bin rack suspends each tote independently by its reinforced perimeter lip, allowing individual slide-out access. Each tote slot is rated for up to 50 pounds of uniformly distributed load. Safe ceiling installation requires anchoring ceiling brackets directly into the center of wood ceiling joists using 5/16-inch by 3-inch steel lag screws pre-drilled with a 3/16-inch pilot bit.
Key Takeaways
- 27-Gallon Tough Tote Standard: Never use lightweight clear plastic storage containers. The system requires heavy-duty polypropylene 27-gallon totes with rigid, reinforced rim flanges to prevent plastic flex under load.
- 50 Lbs Per Bin Limit: While heavy-duty steel rails support cumulative weight easily, individual plastic bin rims are engineered for a maximum of 50 lbs per container to prevent heat creep in warm garages.
- Joist Center Fastening: Every ceiling bracket must be centered on solid wood ceiling joists. Never anchor into drywall, plaster, or strapping using hollow wall anchors.
- Garage Door & Vehicle Clearance: Verify that the lowest point of the suspended totes maintains at least 2 to 3 inches of clear headroom above your vehicle roof and stays clear of open garage door panels.
The Mechanics of Ceiling Tote Slide Storage Systems
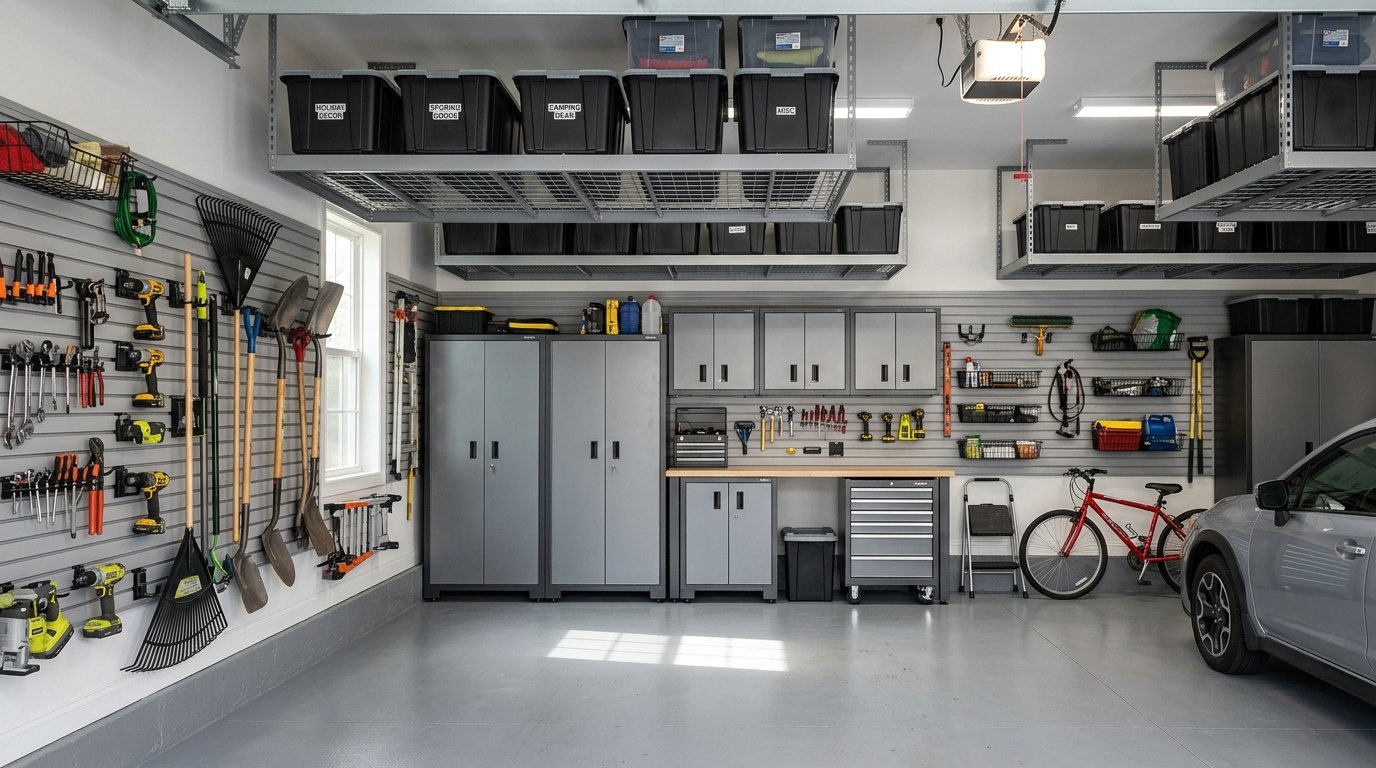
Reclaiming vertical air space in residential garages is the most effective way to eliminate floor clutter without sacrificing parking space. Traditional overhead wire racks provide wide platforms, but storing large plastic bins on a flat shelf creates a frustrating logistics problem: to reach the bottom container in a stack of four, you must manually unstack hundreds of pounds of overhead gear while balancing on a stepladder. For general overhead platform options, review our guide on what overhead rack garage storage systems offer.
A SafeRacks storage bin rack re-engineers ceiling storage using parallel C-channel steel slide rails. Rather than resting on a flat wire deck, storage totes slide horizontally along heavy-gauge steel lips that support the container directly underneath its molded top rim. This design provides distinct functional advantages:
- Independent Container Access: Any individual tote can be pulled out and lowered without shifting, unstacking, or disturbing adjacent containers.
- Maximum Vertical Density: Because there is zero wasted clearance between stacked tiers, sliding rail racks utilize tight overhead spaces above garage door openers where full wire racks cannot fit.
- Drop-Free Channel Stops: Integrated steel end stops prevent totes from sliding out of the rear of the rack during loading, keeping heavy containers locked within their guided channels.
- Modular Expandability: Channels can be mounted in single-row configurations (typically holding 4 to 6 bins) or expanded into dual-row and quad-row arrays holding up to 12 to 16 full-size storage totes.
Ceiling Joist Engineering & Lag Bolt Fastening
Mounting hundreds of pounds of plastic totes and stored hardware overhead introduces structural gravity and seismic liabilities. Understanding how your garage ceiling frame is constructed is essential before driving your first fastener. For broader ceiling mounting strategies, review our garage hanging storage and ceiling hoists guide.
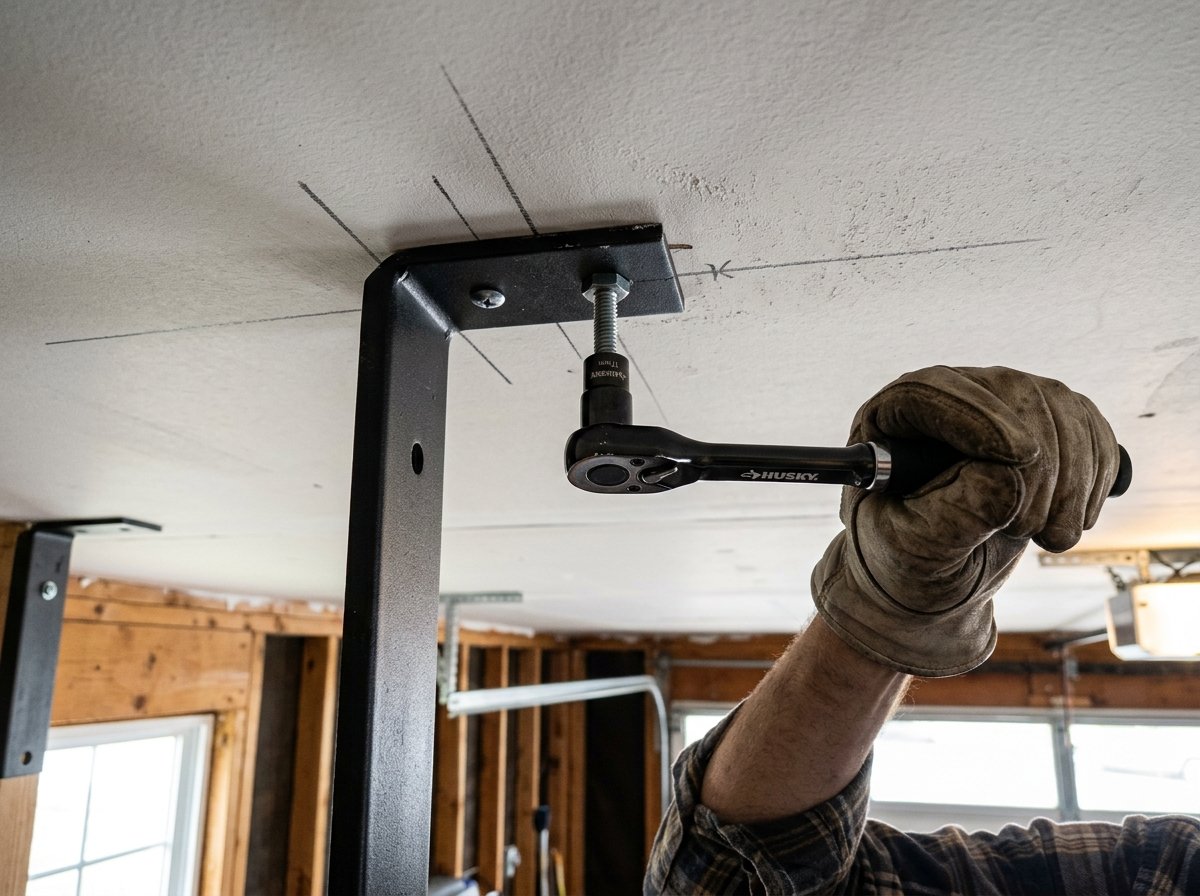
Parallel vs. Perpendicular Joist Orientation
Garage ceiling joists or roof trusses are commonly framed with 2×4, 2×6, or 2×8 dimensional lumber spaced either 16 inches or 24 inches on center. Before purchasing your bin rack, determine which direction your joists run:
- Perpendicular Installation: Installing mounting brackets across multiple joists distributes the cumulative load across two, three, or four separate structural framing members. This is the structurally preferred layout according to the American Wood Council (AWC) wood construction standards.
- Parallel Installation: If you must mount ceiling brackets along the length of a single joist, ensure the total weight of the loaded rack does not exceed the allowable dead load capacity of that individual framing member.
The 3/16-Inch Pilot Hole Rule
The primary point of structural failure in overhead rack installations is improperly driven lag screws. Many homeowners make the mistake of driving a large 5/16-inch lag bolt directly into old, dry Douglas fir or Southern yellow pine without pre-drilling. Driving a lag bolt without a pilot hole frequently splits the internal wood fibers, reducing bolt withdrawal resistance by up to 75%.
Always use a high-speed steel 3/16-inch drill bit to bore a clean pilot hole at least 2.5 inches deep directly into the center third of the ceiling joist. The lag screw must penetrate solid wood by a minimum of 2.5 inches—drywall thickness (typically 1/2-inch or 5/8-inch) does not count toward structural thread engagement.
SafeRacks Bin Rack Sizing & Capacity Comparison
Choosing the right configuration depends on ceiling height, available width between garage door tracks, and the number of totes you need to store. For wall-mounted alternatives, consult our garage wall shelves stud mounting guide.
| Rack Configuration | Tote Capacity | Max Weight Rating | Footprint Dimensions | Ideal Garage Zone |
|---|---|---|---|---|
| Single-Rail 4-Bin Unit | 4 × 27-Gallon Totes | 200 lbs (50 lbs / bin) | 30″ W × 84″ L × 17″ Drop | Narrow side ceiling or above garage door track |
| Dual-Row 8-Bin System | 8 × 27-Gallon Totes | 400 lbs (50 lbs / bin) | 60″ W × 84″ L × 17″ Drop | Center ceiling bay between garage door tracks |
| Triple-Row 12-Bin Array | 12 × 27-Gallon Totes | 600 lbs (50 lbs / bin) | 90″ W × 84″ L × 17″ Drop | Deep 2-car or 3-car garage rear ceiling bay |
| Floor-to-Ceiling Bin Tower | 8 × 27-Gallon Totes | 400 lbs (50 lbs / bin) | 30″ W × 44″ D × 72″ H | Perimeter wall staging for low-ceiling garages |
Tote Lip Clearances & Slide Rail Geometry
The operational success of a SafeRacks storage bin rack depends on the exact fit between the sliding rail channel and the rim of your storage container. For organizing bin interiors, see our closet storage bins sizing guide.
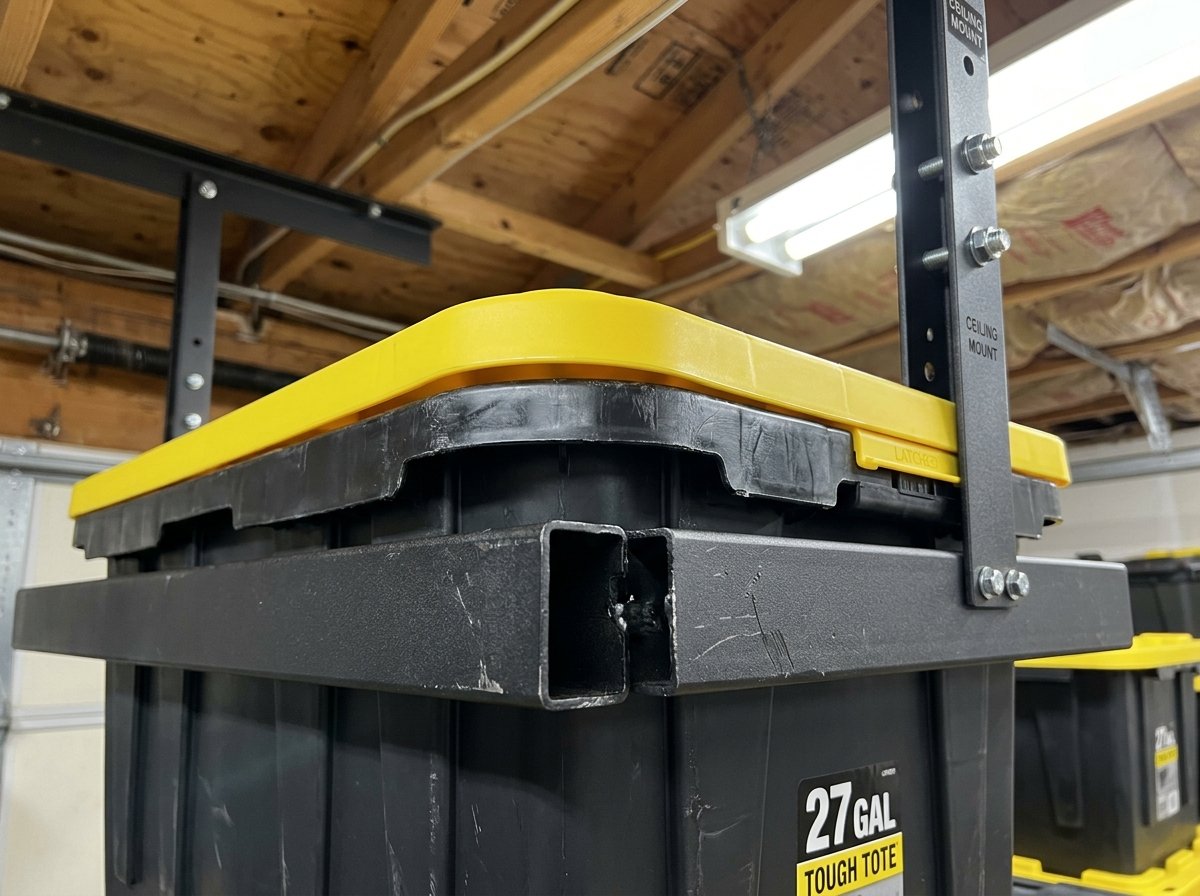
Why 27-Gallon Tough Totes Are Mandatory
SafeRacks bin racks are engineered specifically around standard 27-gallon heavy-duty storage containers. These containers (commonly marketed under brand names like Greenmade Professional, Home Depot Commander, Lowe’s Tough Box, and Project Source) feature two critical engineering characteristics:
- Injection-Molded Structural Ribbing: The top lip features deep vertical honeycombed gussets molded directly into the polypropylene rim. When suspended from the rails, these gussets prevent the rim from curling downward under the weight of the tote’s contents.
- Uniform Lip Width: The top flange projects outward by approximately 0.75 inches along the long sides, providing maximum surface contact across the horizontal steel slide channel.
Never attempt to hang lightweight clear plastic storage containers or holiday totes on sliding ceiling rails. Thin consumer tubs lack rim stiffening ribs; when heated in a summer garage attic space, the plastic undergoes creep deformation, allowing the tub to slip between the rails and drop its contents onto vehicles parked below.
Rail Spacing Tolerances
During assembly, maintaining exact parallel rail spacing is critical. If the slide channels are installed even 1/2 inch too wide, the tote lip will have insufficient bearing support and can easily drop. If channels are installed 1/2 inch too narrow, the bin will bind and wedge tightly against the steel, making it impossible to slide out without jarring the overhead ceiling brackets.
Always assemble the horizontal ceiling crossbars using the factory-drilled alignment holes, and slide an empty 27-gallon tote through each channel before tightening the down-bracket bolts to guarantee smooth, effortless gliding.
Step-by-Step Installation & Safety Protocols
Installing an overhead storage bin rack requires basic tools: a precision stud finder, high-torque cordless drill, socket set, 4-foot level, and a sturdy step ladder. Follow these five procedural steps to ensure a rock-solid installation that satisfies OSHA 1910.176 materials storage safety rules.
Step 1: Locate and Mark Joist Centerlines
Never estimate the position of ceiling joists based on drywall screw heads. Use a multi-sensor deep-scanning stud finder to locate both the left and right edges of each joist. Mark the exact center of each wood framing member with a pencil, and snap a chalk line across the joists to establish your primary bracket mounting axis.
Step 2: Pre-Drill Pilot Holes and Mount Ceiling Brackets
Position the heavy-gauge steel ceiling angle brackets along your chalk line. Align the mounting slots directly over your joist center marks. Drill 3/16-inch pilot holes to a depth of 2.75 inches. Using a 1/2-inch socket, drive the supplied 5/16-inch by 3-inch heat-treated lag screws with flat washers until the bracket seats firmly against the ceiling drywall without crushing the sheetrock core.
Step 3: Connect Down-Tubes and Adjust Drop Height
Attach the vertical drop tubes to the ceiling angle brackets using the supplied grade 5 carriage bolts and nylon locknuts. Adjust the vertical drop so that the lowest point of the totes clears your garage ceiling obstacles while remaining easily reachable with a 2-step utility ladder. In buildings equipped with fire suppression systems, remember that the National Fire Protection Association (NFPA) storage standards require maintaining at least 18 inches of clearance between storage containers and fire sprinkler heads.
Step 4: Secure Slide Rail Channels and Test Clearance
Fasten the horizontal C-channel slide rails to the bottom of the vertical drop tubes. Ensure the channel lips point inward toward each other to form the sliding track. Before fully torquing the hardware, slide an empty 27-gallon test tote through the entire run from front to back. Verify that the tote glides freely without binding or popping off the rail flanges.
Step 5: Load Distribution and Safety End Pins
Once all structural fasteners are torqued, insert the safety stop pins or bolts at the rear of each track to prevent bins from rolling past the end of the channel. When staging loaded bins:
- Place heavier bins (containing tools, automotive fluids, or hardware) in the slots closest to the primary ceiling mounting brackets to minimize cantilever deflection.
- Keep lighter seasonal items (holiday decorations, camping bedding, sporting goods) in the center or front slots.
- Always verify that the tote snap-on lids are firmly latched on all four corners before lifting the container into the slide channel.
For ground-level heavy storage solutions, compare our heavy-duty garage shelving specs and weight guide.
Frequently Asked Questions
Can you use any plastic tote with a SafeRacks storage bin rack?
No. SafeRacks storage bin racks are specifically engineered for heavy-duty 27-gallon tough totes, such as Home Depot Commander, Lowe’s Tough Box, and Costco Greenmade totes. These containers feature thick, reinforced perimeter rim flanges and structural honeycomb ribs that support weight while suspended. Standard clear plastic storage bins or thin storage tubs lack the necessary rim stiffness and will sag, crack, or slip through the rails under load.
How much weight can a SafeRacks storage bin rack hold?
The SafeRacks storage bin rack is rated to hold up to 50 pounds per storage bin. Total rack capacity depends on the model: a 4-bin unit holds up to 200 pounds, an 8-bin system holds up to 400 pounds, and a 12-bin array supports up to 600 pounds. All weight ratings assume Uniformly Distributed Loads (UDL) and require proper lag bolt installation into solid wood ceiling joists.
Can you install a SafeRacks bin rack into metal ceiling joists or I-beams?
Yes, but you cannot use standard wood lag screws. Installing into metal ceiling studs, commercial steel C-channels, or engineered steel I-beams requires commercial-grade self-drilling structural Tek screws or heavy-duty through-bolts with backing plates rated for overhead suspension. Always consult an engineer when attaching overhead storage to non-wood structural framing.
What ceiling height do you need to install overhead tote slide racks?
A standard 27-gallon tough tote measures approximately 15.5 inches in height. When mounted on ceiling slide rails, the total drop from the drywall to the bottom of the tote is approximately 17 to 18 inches. To comfortably walk beneath the installed racks or park an SUV or pickup truck underneath, your garage ceiling should ideally be at least 9 to 10 feet high. For 8-foot ceilings, install the rack above the garage door track or along perimeter wall perimeters where foot traffic does not pass.

Callum Langham
Founder & Technical Storage Editor
Callum Langham is the founder and technical editor of Rack System. With over 12 years of hands-on field experience in warehouse logistics, garage organization, and industrial storage installations, Callum specializes in engineering safety standards, beam load calculations, and OSHA/RMI compliance. Every Rack System guide is audited against verified steel gauge tolerances and municipal building codes.