Quick Answer: Best Garage Hanging Storage Setup
The most secure garage hanging storage setup combines stationary overhead ceiling racks bolted perpendicularly across multiple wood ceiling joists with wall-mounted steel track rails for heavy tools. Overhead stationary platforms (4×8-foot steel grids) carry 300 to 600 pounds using 5/16-inch by 3-inch structural lag screws embedded at least 2.5 inches into solid joist centers. For awkward or seasonal gear like kayaks and roof boxes, motorized or pulley-assisted cable hoists provide ground-level loading, while ceiling tote track runners slide plastic bins into otherwise dead space above roll-up garage door tracks.
Key Takeaways
- Perpendicular Joist Anchoring: Never anchor all ceiling drop brackets into a single ceiling joist. Span your mounting brackets across three or four separate joists to distribute static loads evenly across ceiling framing.
- Pure Tension Fastener Stress: Ceiling-hung systems subject lag screws to pure tensile withdrawal force. Use 5/16-inch or 3/8-inch structural fasteners driven into tested stud/joist centers; drywall anchors will drop immediately.
- Garage Door Roll-Up Clearance: The “dead zone” above horizontal garage door tracks requires at least 18 to 24 inches of vertical clearance between the open door panels and ceiling racks.
- Reinforced Storage Totes: In ceiling runner channel systems, use heavy-duty structural foam tote containers with reinforced perimeter lips; cheap consumer bins become brittle and buckle in cold garages.
The Engineering Behind Overhead & Wall Hanging Storage
Reclaiming garage floor space requires moving beyond basic floor shelving and looking upward. Garage hanging storage transforms unused ceiling airspace and open drywall spans into high-density storage zones. However, suspending hundreds of pounds of equipment above parked vehicles, expensive tools, and family walkways introduces critical structural engineering considerations that floor racks never face.
Unlike floor cabinets that transfer their weight directly onto concrete foundation slabs, hanging systems rely entirely on the withdrawal resistance of mechanical fasteners and the bending strength of residential ceiling joists or roof trusses. Before mounting overhead steel frames or hoisting heavy sporting goods, understanding load distributions, joist orientation, and fastener mechanics is essential for creating a long-term, fail-safe storage system.
The 4 Core Types of Garage Hanging Storage Systems
Selecting the right hanging hardware depends on item weight, frequency of access, and garage ceiling architecture. Most high-capacity garages implement a combination of these four core systems.
1. Stationary Overhead Ceiling Racks
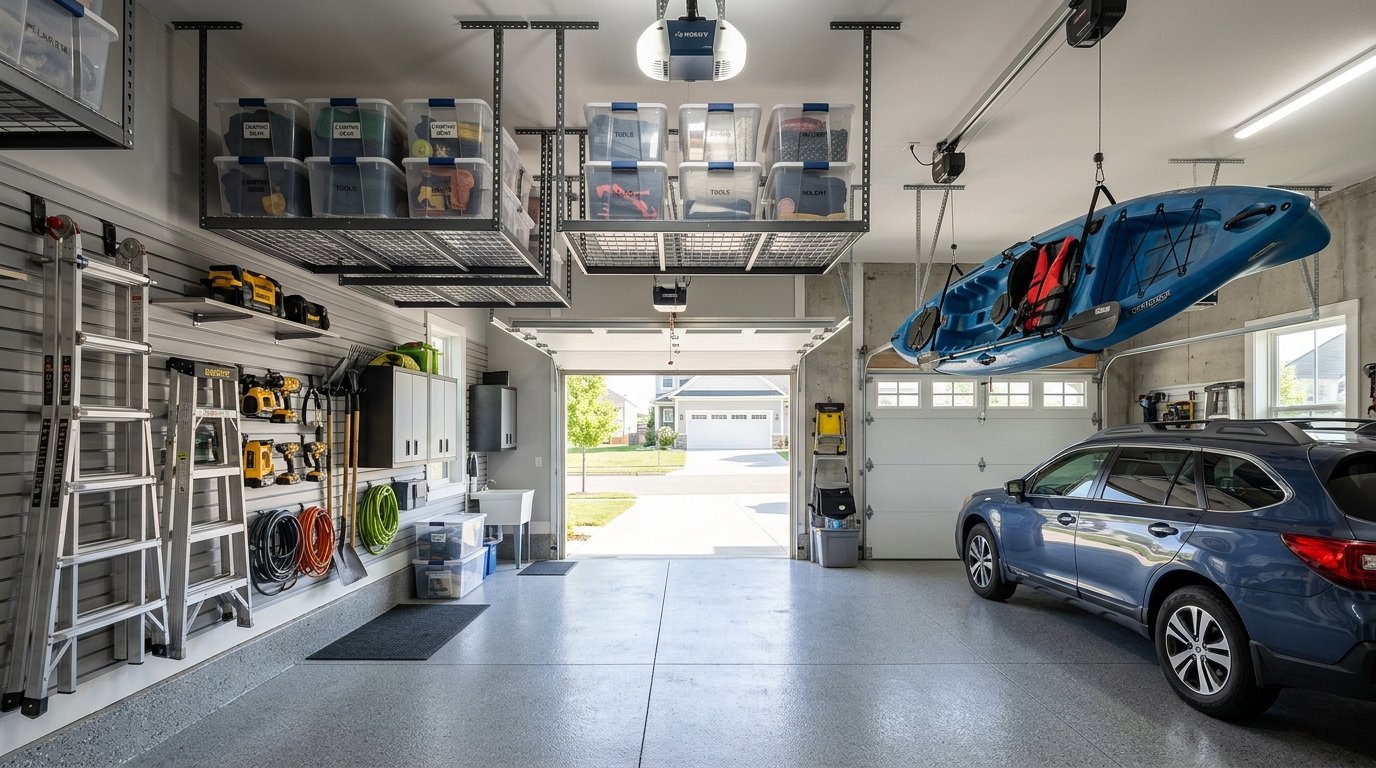
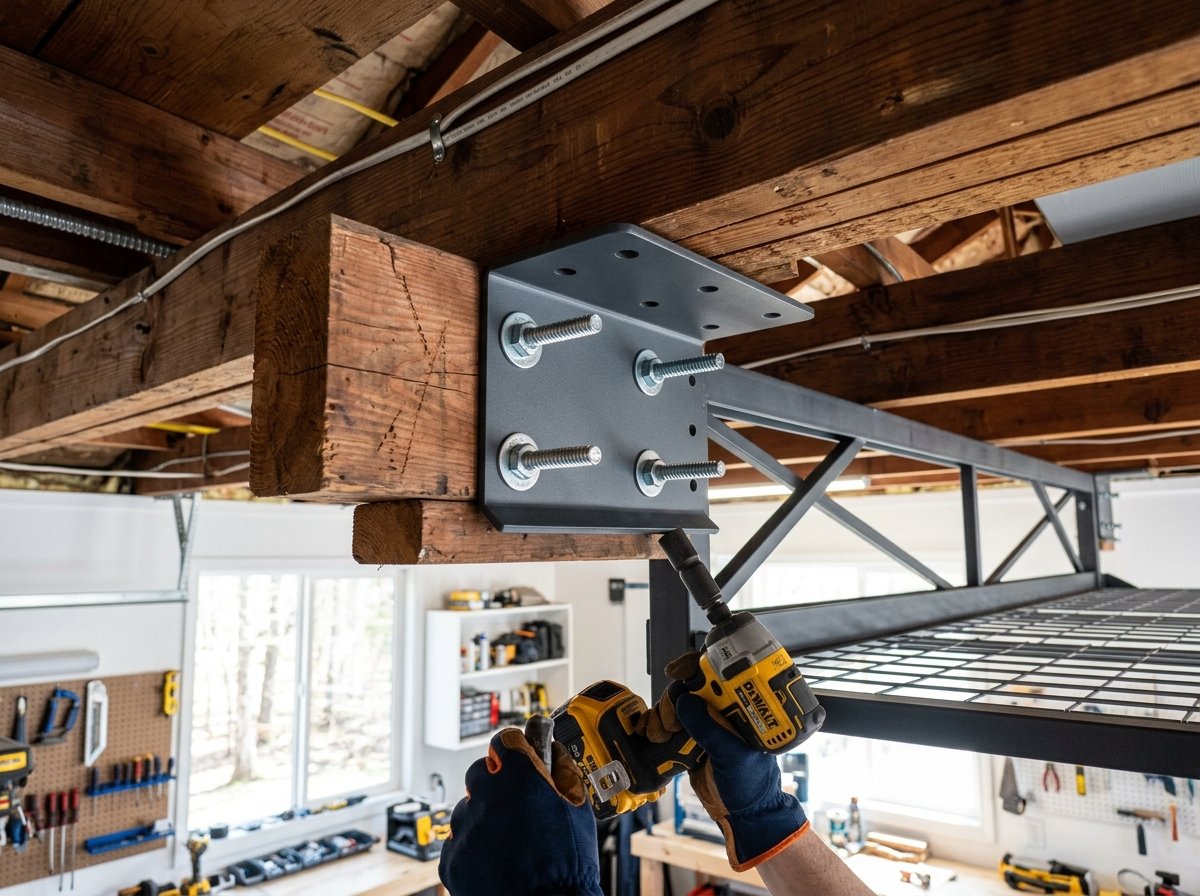
Stationary ceiling platforms are the backbone of high-volume seasonal storage. Built with heavy-gauge angle steel drop brackets and welded wire grid decking, these racks mount directly to ceiling joists.
- Standard Dimensions: Common footprint sizes include 4×8 feet, 4×4 feet, and 3×6 feet, with adjustable down-rod drops ranging from 18 to 44 inches below the finished ceiling.
- Weight Capacities: High-grade commercial ceiling racks are rated for 300 to 600 pounds of uniformly distributed load (UDL) when properly spanned across structural wood framing.
- Best Applications: Long-term storage of holiday decorations, seasonal camping gear, bulky luggage, and plastic storage totes that require access only once or twice a year.
- Key Limitations: Requires a stepladder or step stool to retrieve items, making stationary platforms impractical for tools or sports equipment accessed weekly.
2. Motorized and Manual Mechanical Hoists
For bulky, irregularly shaped gear that is difficult or dangerous to carry up a stepladder, mechanical ceiling hoists provide ground-level loading and smooth lifting. To explore dedicated lifting platforms, review our detailed guide on overhead lowering storage racks.
- Drive Mechanisms: Systems operate via manual 4:1 rope-and-pulley blocks with auto-locking cams, hand-crank worm-gear winches, cordless-drill drive adapters, or 120-volt motorized electric winches with wired or wireless push-button remotes.
- Weight Capacities: Manual rope hoists typically handle 50 to 150 pounds (ideal for bicycles and kayaks), while motorized platform hoists safely lift 250 to 400 pounds of heavy tools, lawn mowers, or cargo roof boxes.
- Safety Features: Professional hoists utilize braided aircraft-grade steel cables, dual redundant safety locking pawls, and integrated limit switches to prevent motor burn-out or accidental free-fall.
3. Ceiling Tote Storage Runners (Channel Track Systems)
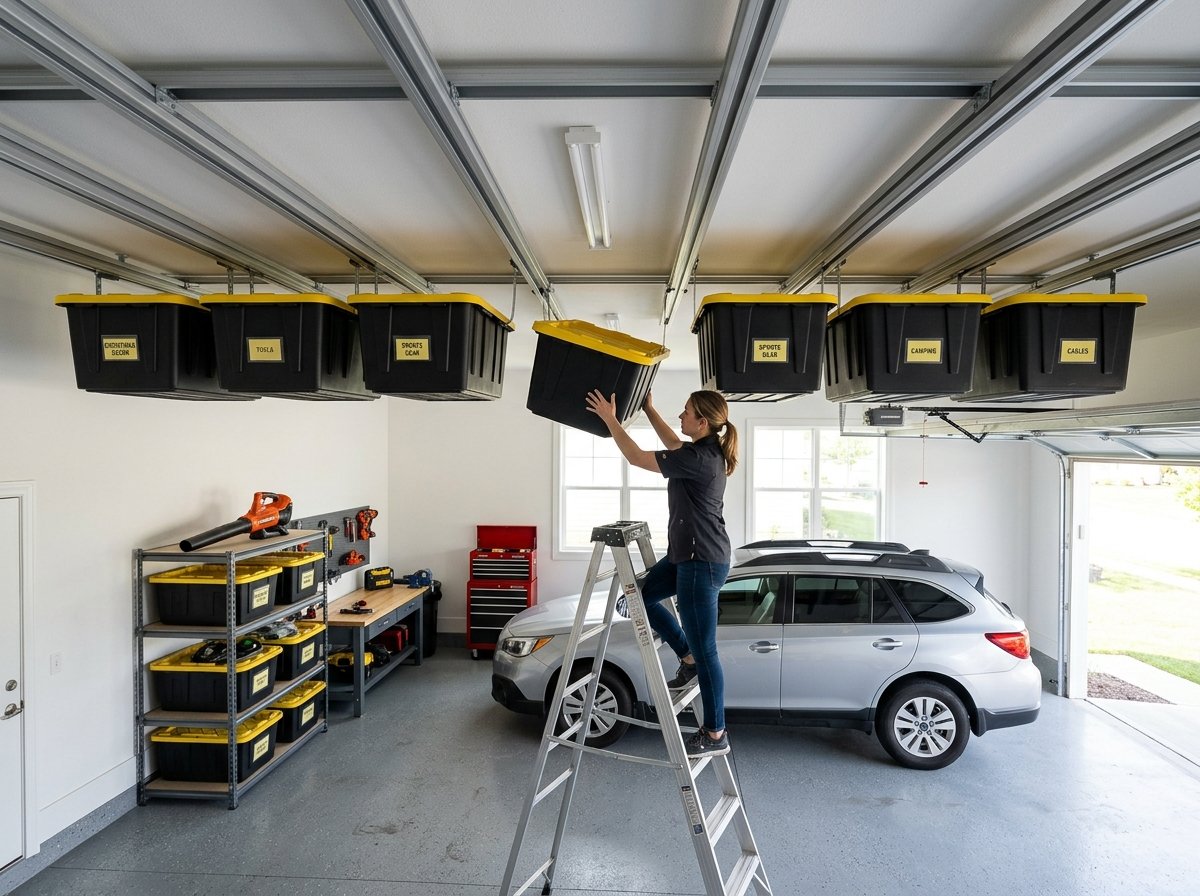
Ceiling tote runners utilize extruded aluminum or powder-coated steel C-channel rails mounted parallel to each other along ceiling joists. The molded perimeter lip of standard plastic storage totes slides directly into the channel grooves, suspending the bins horizontally across the ceiling.
- Space Optimization: These rails capture shallow vertical spaces (12 to 18 inches) that are too compact for full-size grid racks, such as the space directly above roll-up garage door tracks.
- Modular Runs: Rails can be mounted in tandem to hold anywhere from two to eight 27-gallon bins per track row.
- Tote Selection: Always pair channel tracks with commercial heavy-duty industrial storage totes (such as black containers with yellow snap-lock lids). Thin, transparent consumer totes have brittle rim lips that crack when cold, risking a sudden drop.
4. Wall-Mounted Heavy-Duty Track and Rail Systems
Hanging storage is not limited to ceilings. Horizontal wall tracks (such as steel GearTrack channels or commercial PVC slatwall panels) transform vertical wall space into an adaptable hanging grid. For stud framing and fastener shear requirements, consult our garage wall shelves stud mounting guide and our specialized garage hooks weight limits guide.
- Load Spreading: Heavy steel wall channels are lagged horizontally across multiple wall studs, distributing concentrated hook loads across the building’s structural studs.
- Interchangeable Attachments: Specialized snap-in hooks, double-cradle utility brackets, hose loops, and hanging wire baskets lock into the channel profile without tools.
- Ideal Gear: Extension ladders, wheelbarrows, string trimmers, garden hoses, and heavy power tool cases that must be kept elevated off damp garage floor slabs.
Structural Physics: Joist Loading, Fasteners & Pull-Out Tension
When installing garage hanging storage, you cannot guess at fastener strength. Ceiling installations present an entirely different mechanical challenge than wall shelves due to the direction of gravity.
The Pure Tension Withdrawal Factor
When mounting a wall shelf, fasteners primarily resist vertical shear force (downward cutting load across the fastener shank), aided by friction against the stud face. However, with overhead ceiling hanging storage, gravity exerts a 100% direct tensile withdrawal force. The entire load is constantly trying to pull the screw straight down out of the wood fibers.
Fastener withdrawal resistance depends on wood species density, thread root diameter, and thread engagement depth:
- Spruce-Pine-Fir (SPF) Framing: A standard 5/16-inch steel lag screw embedded 2.5 inches into solid SPF lumber has an ultimate withdrawal capacity of roughly 350 to 450 pounds.
- Douglas Fir / Southern Yellow Pine: Denser softwood species achieve 500 to 650 pounds of ultimate withdrawal resistance per lag bolt.
- The Safety Factor: Structural engineers apply a mandatory safety factor of 3:1 to 4:1 for overhead residential loads. Therefore, each 5/16-inch lag bolt safely supports approximately 100 to 125 pounds of working ceiling load. For professional building and safety engineering standards, review APA Engineered Wood Association joist load standards, OSHA walking-working surface and overhead storage safety rules, and ASTM fastener withdrawal resistance test guidelines.
Joist Orientation: Perpendicular vs. Parallel Spans
One of the most dangerous DIY installation mistakes is mounting an overhead ceiling rack parallel to a single ceiling joist. Spanning a 600-pound loaded 4×8-foot rack along one 2×6 or 2×8 joist places excessive point-load deflection on that single timber, risking ceiling drywall cracking or joist warping.
The Golden Rule: Always orient overhead ceiling racks perpendicular to your ceiling joists. A standard 4×8-foot rack positioned across joists spaced 16 inches on-center distributes its weight across four or five separate structural members. If your ceiling layout forces a parallel installation, install 2×6 or 2×4 solid wood blocking between adjacent joists to create rigid cross-span mounting points.
Critical Installation Clearances: The “Dead Zone” Rules
A poorly planned ceiling storage installation can render garage doors inoperable or damage vehicle roofs. Measure these three critical clearances before drilling your first pilot hole.
1. Roll-Up Garage Door Path Clearance
The space directly above your open garage door is often tempting for ceiling storage, but it requires precise spatial accounting. Sectional overhead garage doors swing up and outward on curved tracks. Measure the door in its fully raised, open position:
- Measure from the highest point of the door panel’s arc travel to the finished ceiling.
- Maintain a minimum of 18 to 24 inches of clear vertical space between the top of the horizontal tracks and the bottom of your ceiling racks or tote channels.
- Ensure hanging down-rods never interfere with ceiling torsion springs, center drive tracks, or electric trolley opener arms.
2. Vehicle Roof and Tailgate Liftgate Clearance
Never size hanging rack drop heights based on an empty garage. Modern SUVs and crossover trucks feature powered rear liftgates that rise significantly higher than the vehicle’s roofline:
- Park your tallest vehicle inside the bay and open the rear liftgate to its maximum height.
- Measure the clearance from the open liftgate’s highest edge to the ceiling.
- Establish your hanging storage drop height to maintain at least 6 to 8 inches of safety clearance above the open hatch to prevent accidental contact when unpacking groceries.
3. Walking Walkway Headroom
In perimeter zones where vehicles are not parked, building safety codes recommend maintaining at least 80 to 84 inches (6 feet 8 inches to 7 feet) of floor clearance beneath hanging hardware to ensure safe pedestrian passage without bumping heads on corner angle irons.
Garage Hanging Storage Systems Comparison
| Storage System Type | Typical Capacity | Primary Mounting Location | Best Items to Store |
|---|---|---|---|
| Stationary Overhead Steel Racks | 300 to 600 lbs (UDL) | Perpendicular ceiling joists | Holiday totes, camping gear, luggage, spare tires |
| Motorized Ceiling Platform Lifts | 250 to 400 lbs | Open ceiling bays with power access | Roof cargo boxes, lawn mowers, snowblowers, heavy toolkits |
| Manual Pulley & Cable Hoists | 50 to 150 lbs | Direct joist center lines | Kayaks, canoes, stand-up paddleboards, adult bicycles |
| Ceiling Tote Track Runners | 30 to 40 lbs per tote | Shallow ceiling zones above doors | 27-gallon industrial bins, hardware sort boxes, small seasonal items |
| Heavy-Duty Wall GearTracks | 75 to 100 lbs per hook (linear) | Horizontal wall studs at 48 to 72 inches | Ladders, leaf blowers, weed trimmers, folding sawhorses |
Step-by-Step Installation: Safe Overhead Joist Anchoring
Follow this proven procedure to safely secure stationary ceiling racks into finished or unfinished garage ceilings.
- Locate and Verify Joist Centers: Use a deep-scanning magnetic or dielectric stud finder to map out your ceiling joists. Once you identify the edges of a 1.5-inch joist, mark the exact center. Drill a 1/8-inch test pilot hole; you must feel continuous solid wood resistance for at least 2 inches. If the bit punches through empty drywall, adjust your marks before proceeding.
- Position Ceiling Mounting Brackets: Lay out your corner brackets so they span perpendicular across joists. For an 8-foot rack, ensure your outer brackets land squarely over structural joists spaced 16 or 24 inches on-center.
- Pre-Drill Structural Pilot Holes: Drill full-depth pilot holes using a 3/16-inch drill bit for 5/16-inch lag screws. Pre-drilling prevents splitting the dry dimensional lumber while allowing the screw threads to cut clean, deep grooves into the wood grain.
- Drive Lag Screws with Washers: Install heavy steel flat washers under each lag bolt head. Using an impact driver or ratchet socket, drive the 5/16-inch by 3-inch lag bolts into the joist centers until the bracket clamps tightly against the ceiling. Do not over-torque and strip the wood fibers.
- Assemble Down-Rods and Deck Grids: Bolt the vertical angle down-rods to the ceiling brackets using Grade 5 machine bolts and nylon lock nuts. Check all corners with a 4-foot bubble level before dropping in the wire grid decking panels.
- Perform a Static Load Test: Before loading fragile bins, pull down firmly on each corner of the rack with your body weight (150+ lbs). Listen for creaking, inspect brackets for deflection, and ensure zero movement at the ceiling interface.
Frequently Asked Questions
How much weight can a garage ceiling hold safely?
Most residential garage ceiling joists built with 2×6 or 2×8 lumber spaced 16 inches on-center can safely support a dead load of 10 to 20 pounds per square foot, plus an additional hanging storage allowance of 250 to 500 pounds distributed across multiple joists. Pre-engineered roof trusses require careful inspection; bottom truss chords are primarily engineered in tension to hold ceiling drywall. When anchoring heavy storage to trusses, always spread the load across three or more truss chords, or consult the truss manufacturer’s engineering placard before exceeding 250 pounds.
Can you hang heavy storage from garage roof trusses?
Yes, but with strict load limits. Engineered roof trusses are designed to support roof snow and wind loads, with relatively low allowable bottom-chord dead loads (typically 5 to 10 lbs per square foot). To hang storage safely from trusses, use lightweight wire racks, avoid point-loading a single bottom chord, and bridge brackets across at least 3 to 4 truss chords with a 2×6 wood spreader ledger to distribute the weight across the entire roof structural web.
What size lag bolts should I use for overhead ceiling racks?
The industry standard for overhead ceiling storage racks is 5/16-inch diameter by 3-inch long structural lag screws (or 5/16-inch GRK RSS structural wood screws). When mounting through 1/2-inch ceiling drywall, a 3-inch screw provides 2.5 inches of solid wood thread penetration into the center of the ceiling joist. Always use hardened steel flat washers under hex-head lag bolts to prevent the bolt head from deforming the bracket mounting slots.
How far down should garage ceiling racks hang?
Ceiling rack drop heights should be configured based on your ceiling height and vehicle profile. In standard 8-foot garages, adjust drop heights to 18 to 24 inches, providing sufficient depth for 27-gallon storage totes while preserving 6 feet of walking headroom below. In 10-foot to 12-foot garages, drop rods can extend 36 to 44 inches down, creating massive high-density multi-tier storage zones while maintaining safe clearance above SUV rooflines and truck racks.

Callum Langham
Founder & Technical Storage Editor
Callum Langham is the founder and technical editor of Rack System. With over 12 years of hands-on field experience in warehouse logistics, garage organization, and industrial storage installations, Callum specializes in engineering safety standards, beam load calculations, and OSHA/RMI compliance. Every guide on Rack System is audited against verified steel gauge tolerances and municipal building codes.