Quick Answer: Best Wall Shoe Rack Setup
A wall shoe rack elevates footwear completely off the floor, freeing up narrow hallway walkways and giving robotic vacuums 100 percent cleaning clearance. For tight corridors under 36 inches wide, choose angled 25-degree shelves or ultra-slim flip drawers that project only 6 to 8 inches from the wall. Always secure mounting brackets directly into wood wall studs with 2.5-inch lag screws or use heavy-duty steel toggle bolts, as standard plastic drywall anchors fail under the rotational of 10 or more pairs of shoes.
Key Takeaways
- 100% Clear Floor Space: Floating racks eliminate floor clutter, making mopping and robotic vacuum navigation effortless.
- Flat vs. Angled Projection: Flat shelves require 11 to 12 inches of depth for adult shoes, while angled shelves cut protrusion to just 7 to 8 inches.
- Drywall Anchor Failure: Cantilevered multiplies pull-out force on upper fasteners; always lag into wall studs or install heavy toggle bolts.
- Wall Shield Protection: Add a washable backing or wipeable acrylic kickboard behind tiers to prevent dark shoe soles from scuffing drywall.
Wall Shoe Rack: Get Footwear Off the Floor
Getting shoes off the floor isn’t just about neatness. It’s about reclaiming space, making cleaning easier, and keeping your entryways safe. A wall shoe rack does all this by lifting footwear completely off the ground.
This guide cuts through the marketing fluff to give you the practical details on choosing, mounting,. And using a wall shoe rack effectively.
you live in a small apartment or a large house, floor clutter from shoes is a common problem. Wall-mounted racks are a smart fix. They free up valuable floor space, especially in narrow hallways or tight closets.
This means easier vacuuming, mopping, and less tripping. We’ll cover the different types of wall racks, their real-world dimensions, how to mount them so they stay put,. And what to watch out for.
Why Wall Mount? Clear Floors, More Space
The main reason to go with a wall shoe rack is simple: clear floor space. This is a game-changer for small homes, apartments, or any area with heavy foot traffic. When shoes are elevated, your floor is 100 percent clear.
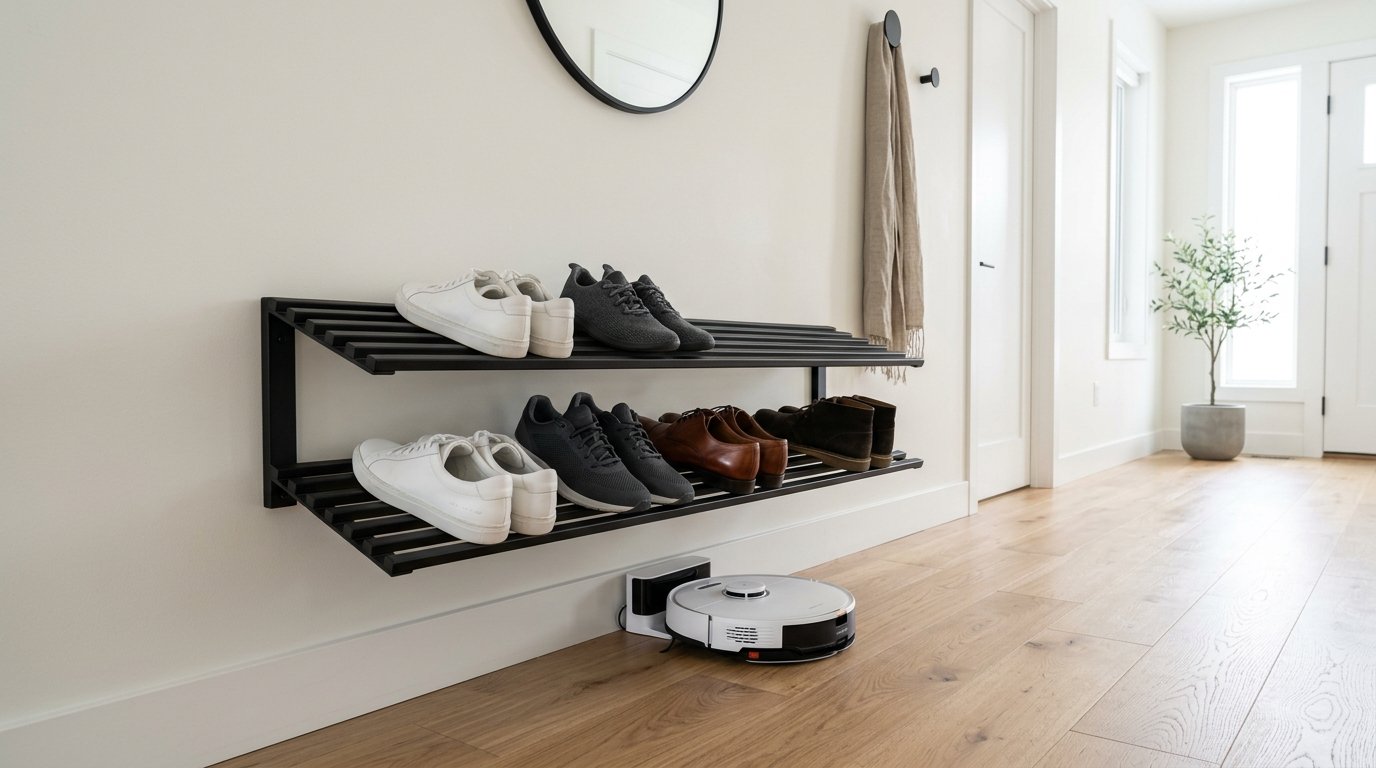
This makes it easy for robotic vacuums to clean without getting stuck. It also lets you sweep or mop without moving a dozen pairs of shoes.
Beyond cleaning, wall racks keep pathways open. In an entryway, a floor rack can shrink your walking path. A wall rack, especially a slim one, preserves the vital 36-inch corridor width needed for comfortable movement and safety.
This is especially important if you use a wheelchair or have mobility issues.
Wall racks also protect your shoes. Storing them off the floor helps keep them away from dirt, dust, and accidental kicks. Good air circulation, especially with slatted or open designs, helps prevent odors and mildew.
Wall Shoe Rack Types Explained
Not all wall shoe racks are the same. They come in different styles, each with pros and cons. Knowing these differences helps you pick the right one for your space and shoe collection.
Floating Slatted Metal Wall Shelves
These are open-design shelves, often made of metal. They attach directly to the wall. The slatted design allows for excellent air circulation.
is good for shoes that need to dry out, like athletic footwear. They have a modern, minimalist look.
- Pros: Great ventilation, simple aesthetic, easy to see shoes.
- Cons: Shoes are visible, can collect dust, flat design needs more depth.
- Depth: 11 to 12 inches (28-30 cm) for adult shoes without overhang.
- for: Utility rooms, garages, or modern entryways where visibility isn’t a concern.
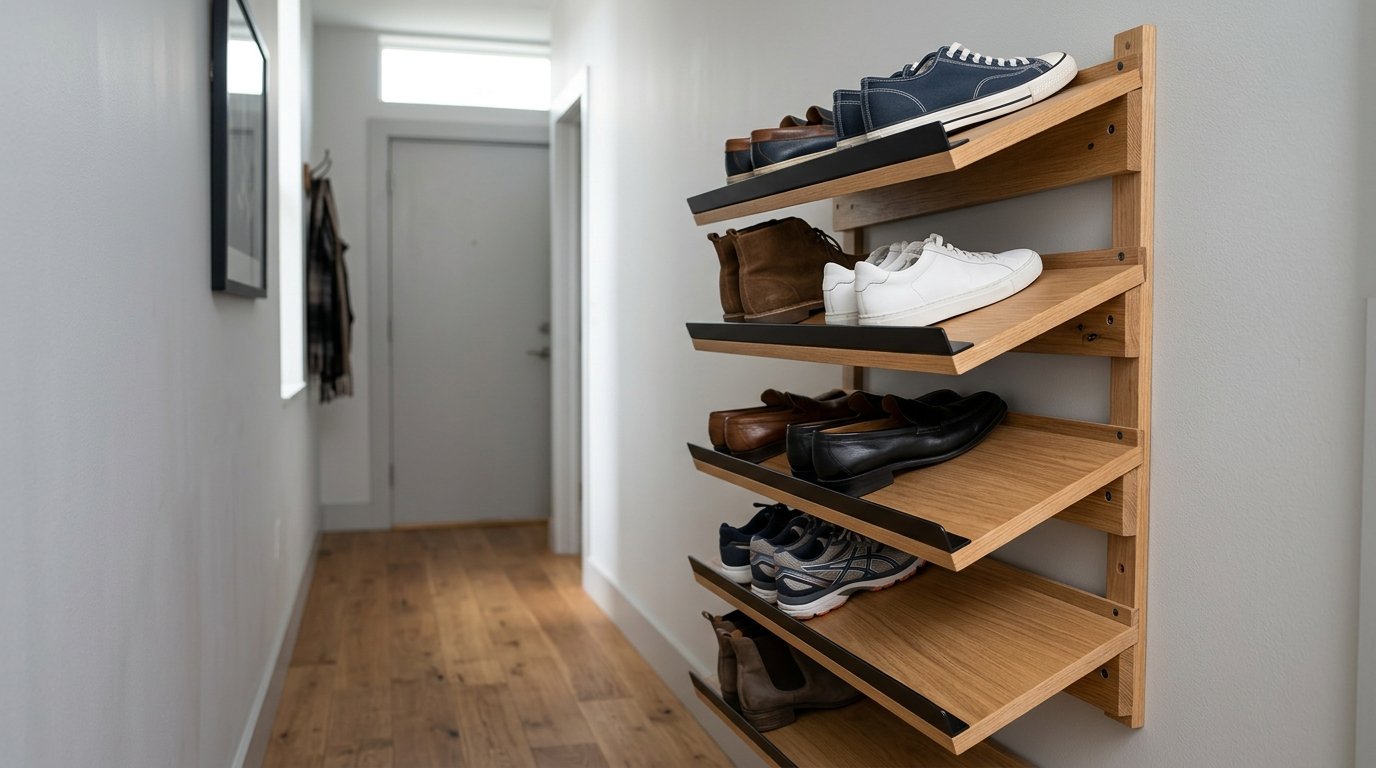
Wall-Mounted Tilted Display Racks
These shelves are angled, usually between 20 and 30 degrees. This angle means they stick out less from the wall than flat shelves. They often have a small lip or heel stop to keep shoes from sliding off.
They’re great for showing off your footwear.
- Pros: Reduces wall projection, showcases shoes, heel stops prevent sliding.
- Cons: Shoes are still visible, might not fit very tall boots easily.
- Depth: 7 to 8 inches for adult shoes, a big space saver.
- for: Narrow hallways, closets, or anyone wanting a display.
Ultra-Slim Flip-Drawer Cabinets
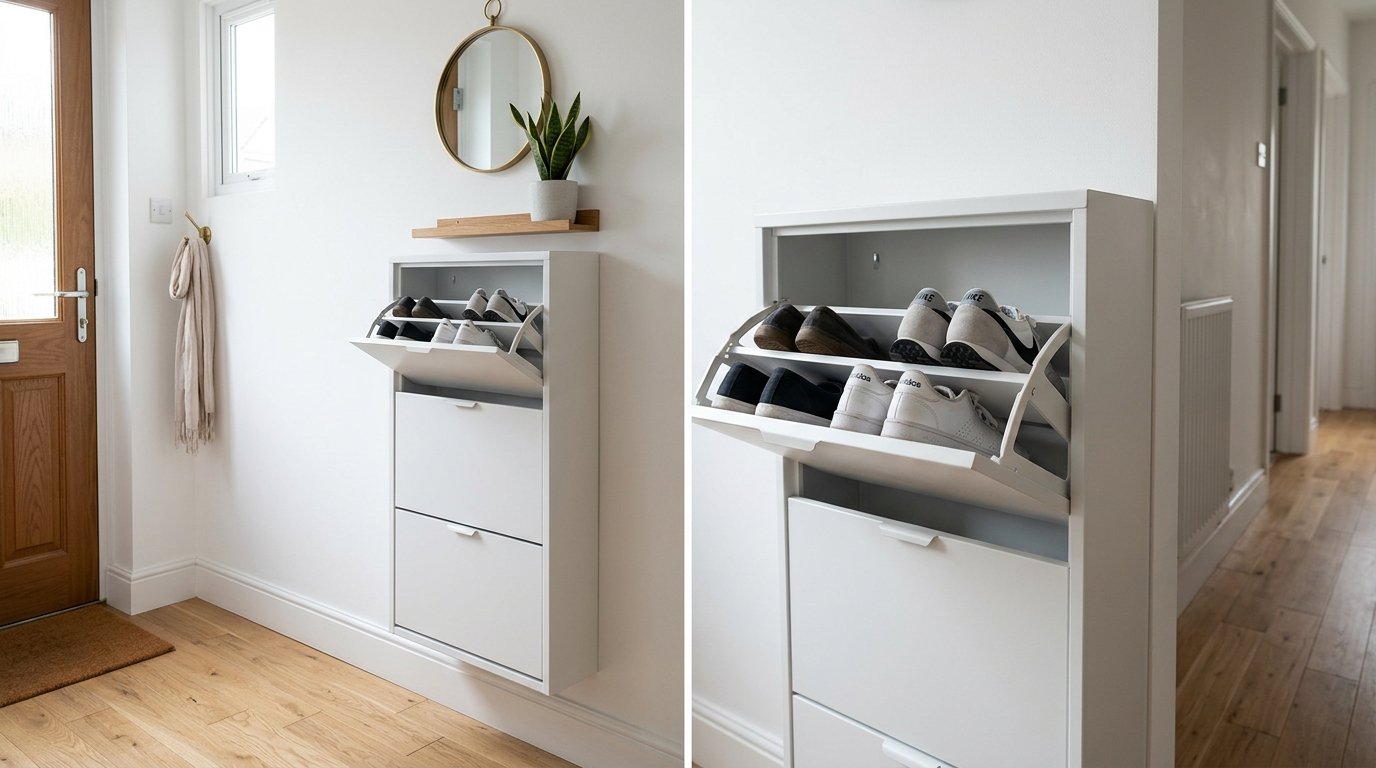
These are enclosed cabinets with drawers that flip open. They are very low profile, often projecting only 6 to 8 inches from the wall. When closed, they hide your shoes completely, offering a very clean, sleek look.
- Pros: Extremely slim profile, conceals shoes, very clean appearance, protects shoes from dust.
- Cons: Limited capacity per drawer, not suitable for boots, can be harder to access specific pairs.
- Depth: 6 to 7 inches, the slimmest option.
- for: Very narrow entryways, small apartments, or minimalist decor.
Modular Interlocking Wall Grids/Rails
These systems use a main rail or grid mounted to the wall. Individual shoe holders, hooks, or small shelves then attach to this main structure. They are highly customizable and expandable.
- Pros: Very flexible, adaptable to different shoe types and quantities, can expand as needed.
- Cons: Can look busy if not organized well, initial setup might take more time.
- Depth: Varies depending on attachments, usually 8 to 11 inches.
- for: Growing shoe collections, varied shoe types, or custom closet systems.
Wall Shoe Rack Sizing and Dimensions
Getting the right size is crucial for a wall shoe rack. This isn’t just about how many shoes it holds, but how it fits your space and your actual footwear.
Depth: Flat vs. Angled Projection Physics
This is one of the most critical dimensions. The depth of a shoe rack tells you how far it will stick out from your wall. This matters a lot in tight spaces like hallways.
- Flat Shelves: For adult men’s size 10-13 shoes, a flat shelf needs 11 to 12 inches of depth. This ensures the entire shoe, heel to toe, sits on the shelf without hanging over. If shoes hang over, they can get knocked off, or make the space feel even tighter.
- Angled Shelves: This is where physics helps. By tilting the shelf at a 20 to 30-degree angle, you can cut the projection depth significantly. An angled shelf can hold the same size shoes but only projects 7 to 8 inches from the wall. This 4-5 inch difference is huge in a narrow hallway. It helps preserve that vital 36-inch corridor walking path, making your space feel much more open and safe.
Widths: Matching Wall Studs
Wall shoe racks come in standard widths like 24, 32, 36, and 48 inches. These widths are chosen for a reason: they often align. With standard wall stud spacing (16 inches on-center in most homes).
Mounting into studs is always the strongest option. Try to pick a rack width that lets you hit at least two studs for maximum stability.
Vertical Tier Spacing: For All Shoe Types
Consider the height needed between shelves.
- Sneakers and Flats: 7 to 8 inches is usually enough clearance.
- high-top Boots and Heels: You’ll need more, typically 12 to 14 inches.
Some modular systems let you adjust shelf height, which is a big plus if you have. Varied footwear.
.
Mounting Your Wall Shoe Rack: Stay Secure
Mounting is where many people go wrong. A wall shoe rack, especially when loaded with shoes, creates significant on its fasteners.
This isn’t like hanging a picture frame. You need to understand the forces at play to prevent it from pulling out of the wall.
Torque Pull-Out Physics: Cantilever Effect
a diving board. The person standing on the end puts a lot of stress on where the board attaches to the pool deck. A loaded wall shoe rack acts the same way.
It’s a cantilever. The weight of the shoes, especially on higher shelves, creates a rotational force. (torque) that tries to pull the top fasteners straight out of the wall.
This force is much greater than just the static weight of the shoes sitting on the shelf.
For example, 30 pounds of shoes on a shelf that. Projects 10 inches from the wall creates 300 inch-pounds of torque. This torque constantly works to pry the top anchors out.
Standard plastic drywall anchors, designed for lighter, static loads, often fail under this kind of stress.
Anchor Load Capacities: Choose Wisely
Your choice of fastener is critical. Don’t skimp here.
- Plastic Ribbed Drywall Anchors: These are common, cheap, and easy to install. They are fine for light items, but they are completely inadequate for a loaded wall shoe rack. They will pull out. Avoid them for this application.
- Heavy-Duty Steel Toggle Bolts (Snap Toggles): When you can’t hit a wood stud, these are your best bet for hollow walls. They spread the load over a larger area behind the drywall. A good 3/16-inch steel toggle bolt can hold 50-100 pounds in 1/2-inch drywall, but remember the torque. Always use several, spaced appropriately, and check the manufacturer’s specific load ratings for pull-out force, not just shear force.
- 1/4-inch Lag Screws into Wood Wall Studs: This is the gold standard. Wood studs are the structural backbone of your wall. A 2.5-inch lag screw driven into the center of a wood stud provides superior holding power, often 100+ pounds per screw. Use a stud finder to locate studs, mark their centers, and pre-drill pilot holes to prevent splitting. This method offers the most secure and long-lasting installation.
For safety and stability, always aim to mount your wall shoe rack into at least two, preferably three, wood studs. If you’re using a modular system with a horizontal rail, make sure that rail spans and anchors into multiple studs.
Weight Capacity: Don’t Overload
Most reputable manufacturers will list a weight capacity per tier or for the entire unit. When anchored into studs, many wall shoe racks can hold 30 to 50 pounds per tier. This is usually plenty for shoes.
But if you’re storing heavy work boots or a large number of shoes, pay close attention to these limits. Exceeding them, even with good anchors, can lead to failure over time.
For more general storage guidelines, you can check out Material Handling Industry storage recommendations. And OSHA walking-working surfaces and storage safety guidelines.
Mounting Comparison Table
| Wall Shoe Rack Style | Projection Depth | Weight Rating Per Tier | Fastening Method |
|---|---|---|---|
| Floating Slatted Steel Shelves | 11 to 12 inches | 40 to 50 lbs per tier | 2.5-inch lag screws into wood wall studs |
| Angled 25-Degree Display Shelves | 7 to 8 inches | 30 to 40 lbs per tier | Heavy-duty 3/16-inch steel toggle bolts or studs |
| Ultra-Slim Flip-Drawer Cabinets | 6 to 7 inches | 25 to 35 lbs total unit | Dual stud anchoring with upper anti-tip brackets |
| Modular Wall Track and Bracket Rails | 8 to 11 inches | 50+ lbs per horizontal track | Heavy horizontal top rail anchored across 2-3 studs |
Wall Protection: Keep Walls Clean
One common problem with wall-mounted shoe racks is scuff marks. Dark shoe soles can leave unsightly marks on painted drywall, especially directly behind or below the shelves. You need to plan for this.
Wall Shield Backing or Kickboards
Some wall shoe racks come with an integrated backing panel, or you can add one. This acts as a shield between your shoes and the wall. Materials like washable acrylic, thin plywood, or even a durable laminate can work.
An acrylic kickboard is a good option because it’s easy to wipe clean and doesn’t distract from the rack.
Scrubbable Paint or Scuff Defense
If you don’t want a physical barrier, consider painting the wall behind. And below the rack with a high-quality, scrubbable satin or semi-gloss paint. These finishes are much easier to clean than flat or eggshell paints.
There are also “scuff defense” paints designed specifically to resist marks and clean easily.
Optimal Elevation Heights
Where you mount your wall shoe rack matters for both function and ergonomics.
Robotic Vacuum Clearance
If you use a robotic vacuum, mount the lowest shelf at least 5 to 6 inches off the finished floor. This gives the robot plenty of room to clean underneath without getting stuck or bumping the rack.
Upper Shelf Ergonomic Limits
Consider who will be using the rack. For average adults, the highest accessible shelf should be between 54 and 60 inches from the floor. Anything higher becomes awkward to reach.
For children, adjust lower as needed. If you have very tall items, like winter boots, plan their placement on lower shelves.
Designing Your Wall Shoe Rack Layout
Before you start drilling, plan your layout. Think about your specific needs.
Shoe Dimensions and Types
Gather all the shoes you plan to store. Measure your longest and tallest pairs. Men’s size 10-13 footwear needs that 11 to 12 inches of flat depth.
High-top boots need 12-14 inches of vertical clearance. Group similar shoes together.
Entryway Sizing and Flow
In a narrow entryway, use angled shelves or ultra-slim flip drawers to keep the projection depth minimal. Remember the 36-inch corridor rule. Place frequently used shoes at an easy-to-reach height.
For a more shoe rack for entryway guide, check out our detailed article.
Closet Integration
In a closet, you might have more depth to work with. You can use flat shelves here. Consider using the wall space above existing closet rods or below hanging clothes.
Modular systems work well in closets because they adapt to your changing needs.
Material Selection: Metal vs. Wood vs. Plastic
Metal Shoe Racks: Steel or aluminum are durable, easy to clean, and offer good ventilation. Powder-coated finishes (matte black, brushed white) are tough and resist scratches. These are often the most practical and long-lasting.
For more details, see our metal shoe rack guide.
Wood Shoe Racks: Can look warmer and more decorative. However, they can be heavier and may not offer the same slim profile. Ventilation might be an issue with solid wood shelves.
Plastic Shoe Racks: Generally lighter and cheaper, but often less durable and stable. Avoid for wall mounting unless it’s a very , engineered plastic system designed for heavy loads.
Installation Best Practices
A good wall shoe rack is only as good as its installation.
- Locate Studs: Use a reliable stud finder. Mark the edges and center of each stud.
- Level and Mark: Use a level to mark your mounting holes precisely. Double-check all measurements before drilling.
- Pre-Drill Pilot Holes: Always pre-drill pilot holes for lag screws into studs. This prevents wood splitting and makes driving the screws easier. For toggle bolts, drill the correct size hole as specified by the manufacturer.
- Test Fit: If possible, temporarily hold the rack in place before final tightening to ensure alignment.
- Tighten Securely: Tighten all fasteners firmly, but don’t over-tighten, especially with toggle bolts, as you can strip them.
- Check Stability: Once installed, give the rack a good tug and push to ensure it’s solid and doesn’t wobble.
Maintenance and Cleaning
Keep your wall shoe rack and the area around it clean.
- Regular Wiping: Dust shelves regularly. For metal or plastic, a damp cloth with mild soap is usually enough.
- Shoe Care: Try to clean off excess dirt from shoes before placing them on the rack. This reduces mess on the shelves and your wall.
- Odor Control: If shoes are prone to odors, consider placing cedar inserts or deodorizing packets inside them. Ensure good air circulation.
Wall Shoe Rack for Specific Needs
Small Spaces and Apartments
In small living areas, every inch counts. Ultra-slim flip-drawer cabinets or angled display shelves are your best friends. Their minimal projection depth keeps hallways clear.
Vertical space is your ally here, so stack multiple tiers if your ceiling height allows.
Families with Kids
Kids’ shoes are often smaller, but they multiply quickly. Consider lower shelves for younger children to reach their own shoes. Durable, easy-to-clean materials are a must.
Modular systems can be good as shoe sizes and quantities change over time.
Shoe Enthusiasts
If you have a large collection, especially if you want to display it, tilted display racks are a good choice. Ensure you have enough vertical and horizontal space. Adjustable modular systems let you customize for different shoe styles, from sneakers to high heels.
Final Thoughts on Wall Shoe Racks
A well-chosen and properly installed wall shoe rack is a powerful tool for home organization. It clears floor space, improves cleanliness, and makes your home feel more open. Don’t just pick the cheapest option.
Think about your specific needs, the types of shoes you have, and the structure of your walls. Invest in good mounting hardware. A little planning and effort upfront will give you a durable, functional storage solution that lasts for years.
Remember, the goal is not just to store shoes, but to improve your living space. A wall shoe rack does this by getting footwear out of the way, making daily life a bit smoother.
People Also Ask (FAQs)
How deep should a wall shoe rack be to fit large shoes?
For adult men’s shoes (size 10-13), a flat wall shoe rack needs. 11 to 12 inches of depth to prevent the shoes from hanging over. If you’re using an angled shelf, a depth of 7 to 8 inches is usually enough, as.
The tilt reduces the required projection from the wall while still accommodating the full length of the shoe.
What is the best way to mount a wall shoe rack to prevent pull-out?
The best method is to use 2.5-inch lag screws directly into wood wall studs. This provides the strongest hold against the cantilever forces of a loaded rack. If studs aren’t available, use heavy-duty 3/16-inch steel toggle bolts for hollow walls.
Avoid standard plastic drywall anchors, as they will likely fail under the weight and of multiple pairs of shoes.
Do wall shoe racks save space compared to floor shoe racks?
Yes, wall shoe racks save significant floor space. They get shoes 100 percent off the floor, which frees up room for walking, cleaning, and other furniture. Ultra-slim designs (6-8 inches deep).
Or angled shelves are especially good for maintaining clear, vital 36-inch corridor walking paths in narrow areas.
How high off the floor should I mount a wall shoe rack?
Mount the lowest shelf at least 5 to 6 inches off the finished floor. This provides enough clearance for robotic vacuums and easy sweeping. For ergonomic access, the highest shelf should generally be no more.
Than 54 to 60 inches from the floor for average adults. Adjust vertical tier spacing based on your shoe types: 7-8 inches for sneakers, 12-14 inches for boots.

Callum Langham
Founder & Technical Storage Editor
Callum Langham is the founder and technical editor of Rack System. With over 12 years of hands-on field experience in warehouse logistics, garage organization, and industrial storage installations, Callum specializes in engineering safety standards, beam load calculations, and OSHA/RMI compliance. Every guide on Rack System is audited against verified steel gauge tolerances and municipal building codes.