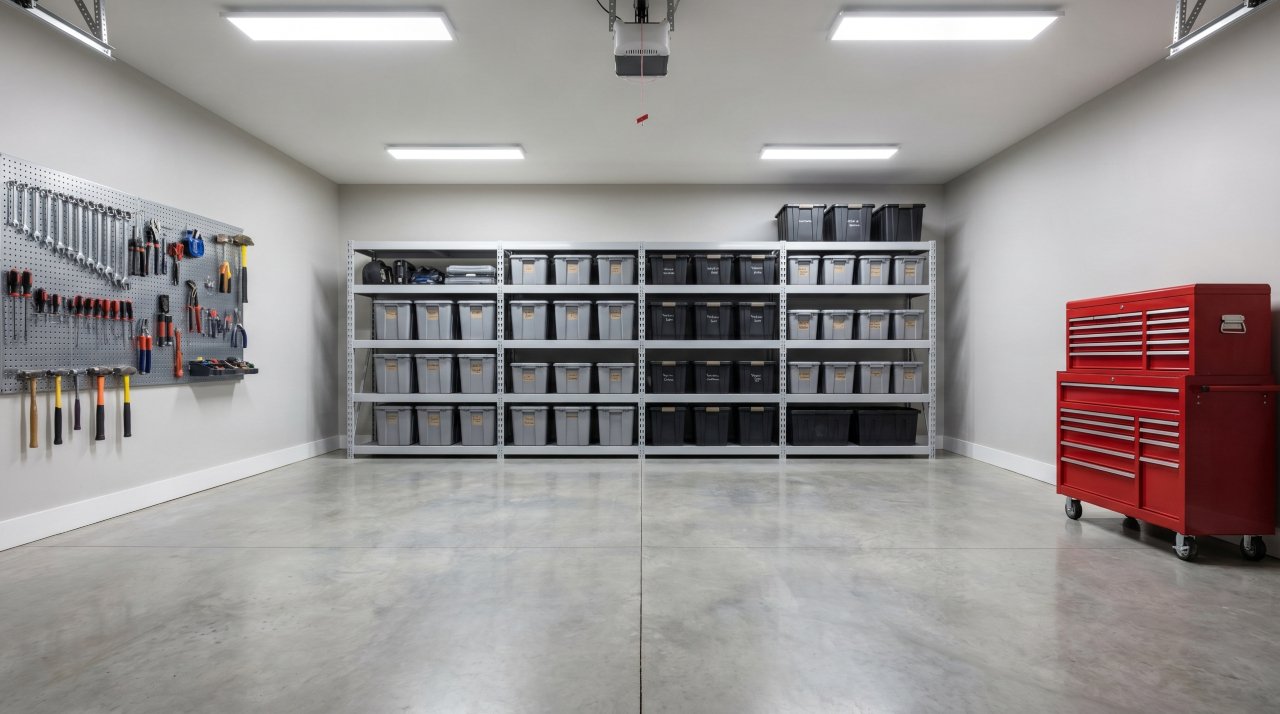
Did you know that 25% of Americans with two-car garages can’t park even one car inside because of clutter? You’re not alone if your garage has become a storage disaster zone. The right shelving system can transform that chaos into organized, accessible storage—but only if you choose wisely.
This guide walks you through garage shelving ideas that actually work for real people with real budgets. You’ll learn how to assess your space, pick the right shelving type, calculate weight capacity, and avoid the expensive mistakes most people make. Whether you’re working with a cramped single-car garage or a spacious workshop, you’ll find practical solutions you can implement this weekend.
Let’s turn your garage into the organized, functional space you’ve been wanting.
Plan Your Garage Space Before Buying Anything
You need to measure your garage and identify your storage needs before shopping for shelves. Most people buy shelving units, bring them home, and discover they don’t fit or don’t hold what they need to store.
Start by measuring your garage’s length, width, and ceiling height. According to the average American garage size, single-car garages typically measure 12×22 feet, while two-car garages run 20×20 feet. Your measurements determine which shelving configurations will actually fit.
Next, inventory what you’re storing. Group items into categories: seasonal decorations, sports equipment, tools, automotive supplies, gardening materials, and household overflow. Write down approximate weights for heavy items like paint cans or toolboxes—this prevents dangerous overloading later.
Walk through your garage and mark “must-keep-clear” zones on paper. You need space for your car (if you’re parking inside), walkways between storage areas, and clearance for the garage door mechanism. A simple sketch prevents you from blocking access to electrical panels or water heaters.
Wall-Mounted Shelving: The Foundation of Garage Storage
Wall-mounted shelves give you the most flexibility and floor space. These systems attach directly to wall studs, keeping the floor clear for parking, workbenches, or larger equipment.
Basic bracket shelves are the most affordable option, starting around $50-100 for an 8-foot section. You mount metal or wood brackets every 16-32 inches and lay boards across them. They work perfectly for light to medium loads like storage bins, paint cans, and seasonal items. Installation takes 1-2 hours with basic tools.
Track-based systems cost $150-400 but offer adjustability you’ll appreciate later. Metal tracks mount vertically on the wall, accepting brackets you can reposition without new holes. Brands like Gladiator and Rubbermaid make systems where you can change shelf heights as your storage needs evolve.
Heavy-duty industrial shelving runs $200-600 for professional-grade steel units. These handle serious weight—up to 800 pounds per shelf when properly installed. Choose these if you’re storing automotive parts, heavy tools, or bulk items. They require finding studs and using appropriate anchors, but they’ll outlast cheaper alternatives by decades.
The main limitation of wall-mounted options is that they require solid walls. If your garage has metal siding or drywall without accessible studs, you’ll need freestanding units instead.
Freestanding Shelving Units for Flexibility
Freestanding shelves don’t require wall installation, making them perfect for renters or garages with limited wall space. You can move them around, take them with you, or reconfigure your garage layout without patching holes.
Five-tier metal shelving units cost $60-120 and assemble in 20-30 minutes with no tools beyond a rubber mallet. Each shelf typically holds 200-350 pounds when weight is evenly distributed. These work well for organizing storage bins, camping gear, or household supplies you need to access frequently.
Industrial wire shelving ($100-250) offers better air circulation and visibility. You can see through the shelves to find items quickly, and dust doesn’t accumulate as it does on solid surfaces. The wire construction makes them ideal for garages in humid climates where air flow prevents mildew on stored items.
Modular plastic shelving ($80-180) resists rust, moisture, and chemicals. If you store paint, fertilizers, or automotive fluids, plastic won’t corrode or stain. They’re lighter weight and easier to move but have lower weight capacity—usually 100-200 pounds per shelf.
The downside of freestanding units is stability. They can tip if loaded unevenly or bumped by vehicles. Always anchor tall units to the wall with safety straps, especially in earthquake-prone regions. The securing shelving in earthquake-prone areas guidelines from FEMA explain proper anchoring techniques.
Overhead Ceiling Storage Maximizes Vertical Space
Your garage ceiling represents 40-100 square feet of unused storage potential. Overhead shelving keeps seasonal items accessible but out of your daily workspace.
Ceiling-mounted racks ($120-300) bolt directly to ceiling joists and create a platform 12-48 inches below your ceiling. They’re perfect for holiday decorations, camping equipment, or anything you use a few times per year. Most hold 300-600 pounds total when installed correctly.
Adjustable height systems ($250-500) use pulley mechanisms or crank handles to raise and lower platforms. You can easily access stored items without a ladder, making them safer for frequent use. These work brilliantly for seasonal sports equipment—skis come down in winter, kayaks go up.
Motorized lift systems ($400-1,200) offer ultimate convenience for heavy or frequently accessed items. Press a button to lower your fishing gear or rooftop cargo carrier. These make sense if you have mobility limitations or very high ceilings (10+ feet).
Before installing any ceiling-mounted storage solutions, verify your ceiling joists can support the weight. Most garage ceilings handle 50-75 pounds per square foot, but older structures may have limitations. When in doubt, consult a contractor—ceiling failures create dangerous situations and expensive damage.
Heavy-Duty Shelving for Workshops and Tool Storage
Workshop storage demands stronger construction than household organization. Tools, hardware, and equipment require shelving that won’t sag or collapse under concentrated weight.
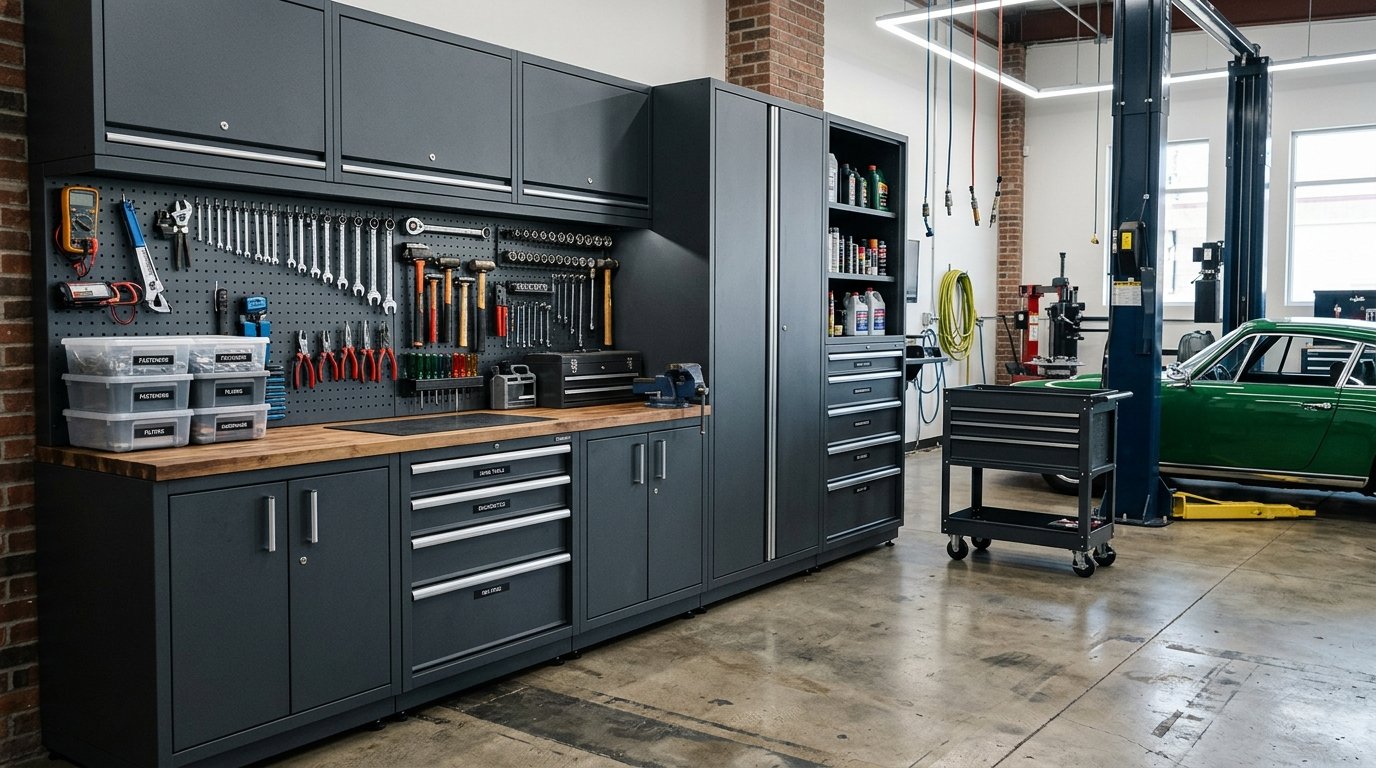
Steel worktable shelving ($300-700) combines work surface with storage underneath. These industrial units feature powder-coated steel frames supporting 1,000+ pounds on the work surface and 300-500 pounds per lower shelf. They create dedicated work zones for specific tasks like woodworking or automotive repair.
Slotted angle shelving ($200-400) uses a bolt-together system that’s infinitely reconfigurable. The slotted steel angles accept shelves at any height in 1-inch increments. When your storage needs change, you just unbolt and rearrange—no new purchases required.
Cantilever racks ($400-900) excel at storing long items like lumber, pipes, PVC, or molding. The arms extend from a central column without front posts blocking access. You can slide materials in and out from the front, making them safer and more convenient than leaning items against walls.
Professional mechanics’ cabinets ($600-2,000+) offer organized tool storage with drawers, pegboards, and compartments. While expensive, they protect tools from moisture and theft while keeping everything at arm’s reach. Consider these if you work on vehicles regularly or run a professional operation from your garage.
Understanding proper weight distribution on shelves prevents dangerous failures. Always place heavier items on lower shelves and distribute weight evenly across the entire shelf surface.
Shelving Materials: Match Climate and Use Case
Material selection affects longevity, maintenance, and safety. Your garage’s environment determines which materials perform best.
Metal shelving (steel or aluminum) resists warping and handles the highest weight capacity. Powder-coated or galvanized steel prevents rust in most climates. Metal costs $2-5 per square foot for materials and works well in temperature-fluctuating environments. The downside is that metal transfers cold in winter and can develop surface rust if the coating chips.
Wood shelving ($1-3 per square foot) offers aesthetic appeal and customization. Plywood or solid lumber lets you cut exact sizes for odd spaces. Seal wood with polyurethane to resist moisture. Wood shelves sag under heavy loads more than metal, so use thicker boards (3/4 inch minimum) and closer bracket spacing (16-24 inches). Wood also provides some insulation value in unheated garages.
Plastic resin shelving ($3-6 per square foot) never rusts, resists chemicals, and cleans easily. It’s the best choice for storing fertilizers, pesticides, pool chemicals, or automotive fluids. Plastic becomes brittle in extreme cold (below 0°F) and has lower weight capacity than metal or wood.
Wire mesh shelving ($2-4 per square foot) promotes air circulation, preventing musty odors and mildew. You can see through shelves to locate items quickly. Wire works excellently in humid coastal areas or anywhere moisture is a concern. The open design isn’t ideal for small items that might fall through.
Combine materials strategically—metal for heavy tools, wood for workshop areas, plastic for chemicals. There’s no rule saying your entire garage must use one material type.
Create Garage Storage Zones for Better Organization
Organizing your garage by activity zones makes finding items faster and keeps similar supplies together. Professional organizers use this zoning strategy because it reduces wasted time and prevents buying duplicates of items you can’t find.
Create a seasonal zone near the garage door for easy access to current-season items. In summer, this might hold beach chairs, coolers, and water toys. In winter, move snow shovels, ice melt, and winter sports gear to this prime real estate. Swap the zones twice yearly so you’re not climbing over snow blowers to reach the lawn mower.
Dedicate a workshop zone with wall organization accessories for tools and supplies. Group items by project type—electrical supplies together, plumbing parts together, woodworking tools together. This prevents time wasted searching through random drawers or boxes.
Establish a sports and recreation zone organized by family member or sport. Shelving with large bins works well for balls, helmets, and protective gear. Install hooks above for bikes, skateboards, or hockey sticks. Keep all soccer equipment in one bin so you can grab everything for practice in seconds.
Set up an automotive zone near where you park for car care supplies, emergency kits, and seasonal items like windshield wash. Floor-level shelving works here since you’ll access these items while standing next to your vehicle.
Create a hazardous materials zone away from heating systems for paints, solvents, fertilizers, and chemicals. Use metal or plastic shelving that won’t absorb spills. Keep this area well-ventilated and away from anything that generates sparks.
Budget-Friendly Shelving Ideas Under $200
You can create functional garage storage for under $200 if you’re willing to invest some labor. These solutions work especially well for renters or anyone testing layouts before making permanent investments.
Cinder block and lumber shelving costs $50-100 for an 8-foot run. Stack concrete blocks as vertical supports and lay 2×10 or 2×12 boards across them. No tools required, infinitely adjustable, and you can disassemble it when you move. Each shelf holds 200-400 pounds depending on board thickness and span length. The industrial look won’t win design awards, but it’s bulletproof reliable.
Repurposed kitchen cabinets ($0-80 at habitat stores or yard sales) mount on garage walls for enclosed storage. Upper cabinets keep dust off items while providing organized compartments. Sand and paint them to match your garage, or leave them as-is for budget storage. Mounting cabinets takes basic DIY skills and a stud finder.
PVC pipe shelving ($40-90) creates custom sizes for odd spaces. Cut PVC pipes as vertical supports and use fittings to create shelf brackets. Lay wood boards across for surfaces. This works brilliantly in narrow spaces between cars or in corners where standard shelving won’t fit. PVC won’t rust and you can reconfigure it with a saw and new fittings.
Pallet shelving ($0-30) uses free wooden pallets as ready-made shelving units. Stand pallets vertically against walls, secure them to studs, and the slats create natural shelf divisions. Sand rough spots and seal the wood. Pallets typically measure 40×48 inches, creating decent storage for about $10 in hardware and sealant.
These budget options have limitations—lower weight capacity, less polished appearance, and more DIY time required. But they prove you don’t need $1,000 to organize your garage effectively.
Premium Shelving Systems: When to Invest More
Premium garage storage systems ($800-3,000+) make sense when you’re staying in your home long-term, use your garage daily, or need professional-grade organization.
Modular slatwall systems transform entire walls into reconfigurable storage. Horizontal panels with grooves accept hooks, baskets, shelves, and specialty holders you can rearrange without tools. Companies like StoreWall and Gladiator offer systems engineered to hold 75-100 pounds per square foot. You’ll spend $12-18 per square foot installed, but the flexibility adapts to changing needs for decades.
Automatic rotating shelving ($1,500-4,000) brings stored items to you like a dry cleaning carousel. Press a button and shelves rotate to deliver what you need. These make sense for serious collectors (tool collectors, memorabilia) or people with mobility limitations. They maximize storage in minimal square footage.
Custom-built systems ($2,000-10,000+) utilize every inch of available space. Professional garage organizers design around your exact vehicles, ceiling heights, and storage requirements. You’ll get features like climate control for wine storage, lighting systems, and integrated workbenches. This level of investment makes sense when your garage functions as a workshop, hobby room, or business operation.
Climate-controlled storage cabinets ($600-2,500) protect sensitive items from temperature and humidity fluctuations. Musicians storing instruments, collectors with memorabilia, or anyone with electronics benefit from stable environments. These sealed units include dehumidifiers or climate control systems.
Calculate return on investment before splurging. If premium systems help you avoid storage unit rentals ($100-200 monthly), they pay for themselves in 1-2 years. If they simply look nicer than functional budget options, save your money for other projects.
Installation Difficulty Ratings by Shelving Type
Knowing installation requirements helps you choose projects matching your skill level and available time. Here’s what you’re actually signing up for with each type.
Beginner-friendly (1-2 hours, basic tools): Freestanding metal shelving requires only a rubber mallet or screwdriver. Pre-cut pieces snap or bolt together following diagram instructions. Wire shelving also falls here—assemble frames, slide in shelves, done. Success rate is nearly 100% even if you’ve never assembled anything before.
Intermediate difficulty (2-4 hours, power drill required): Wall-mounted bracket shelving and track systems need stud-finding skills and drilling accuracy. You’ll need a drill, level, stud finder, and possibly a saw to cut boards. The challenge is ensuring proper anchoring into studs—miss them and shelves fall. Watch a video tutorial first if you’re new to this.
Advanced DIY (4-8 hours, multiple tools): Built-in custom shelving, ceiling-mounted racks, and heavy-duty industrial systems require carpentry or metal working skills. You’ll need to verify ceiling joist locations, calculate weight loads, and ensure code compliance. Mistakes here create safety hazards. Consider hiring help if you’re uncertain about structural elements.
Professional installation recommended: Motorized systems, slatwall panels covering entire walls, or anything requiring electrical work benefits from professional installation. The $200-500 installation cost prevents expensive mistakes and usually includes warranties. If you’re modifying your garage structure (removing drywall, relocating electrical), hire licensed contractors.
Don’t feel pressured to DIY everything. Hiring professionals for the complex parts while handling simpler installations yourself balances budget and safety.
Common Garage Shelving Mistakes to Avoid
Learning from others’ mistakes saves you money and frustration. These errors appear in garages everywhere—don’t add yours to the list.
Ignoring weight capacity is the most dangerous mistake. People see a shelf rated for 200 pounds and load it with 300 pounds of tools or paint. Shelves collapse, items break, and people get injured. Always check manufacturer ratings and leave a 20% safety margin. Distribute weight evenly rather than concentrating it in one section.
Forgetting about garage door clearance ruins many installations. Your garage door tracks, opener mechanism, and door panels need clearance when opening and closing. Measure the door’s full travel path before installing overhead or wall-mounted shelving near the door. Leave at least 12 inches clearance from any moving parts.
Using shelving that’s too deep creates wasted space. Shelves deeper than 24 inches make items in back inaccessible without removing everything in front. Standard 12-18 inch depth lets you see and reach everything. Save deeper shelving (24+ inches) for truly large items like storage bins or seasonal decorations.
Not anchoring to studs leads to catastrophic failures. Drywall anchors won’t safely support loaded shelves. You must hit wall studs (usually 16 or 24 inches apart) with appropriate screws. Use a quality stud finder and verify locations by drilling pilot holes. In concrete walls, use proper masonry anchors rated for your weight requirements.
Buying before measuring results in shelves that don’t fit. That perfect 96-inch shelving unit won’t work in your 92-inch wall space. Measure twice, buy once. Account for baseboards, outlets, light switches, and any wall irregularities.
Choosing appearance over function leaves you with pretty shelves that don’t hold your actual stuff. Those narrow decorative shelves won’t store power tools or paint buckets. Be honest about what you’re storing before falling in love with aesthetics.
Combine Shelving Types for Maximum Efficiency
The most organized garages use multiple shelving types working together. Mixing systems lets you match each storage challenge with the ideal solution.
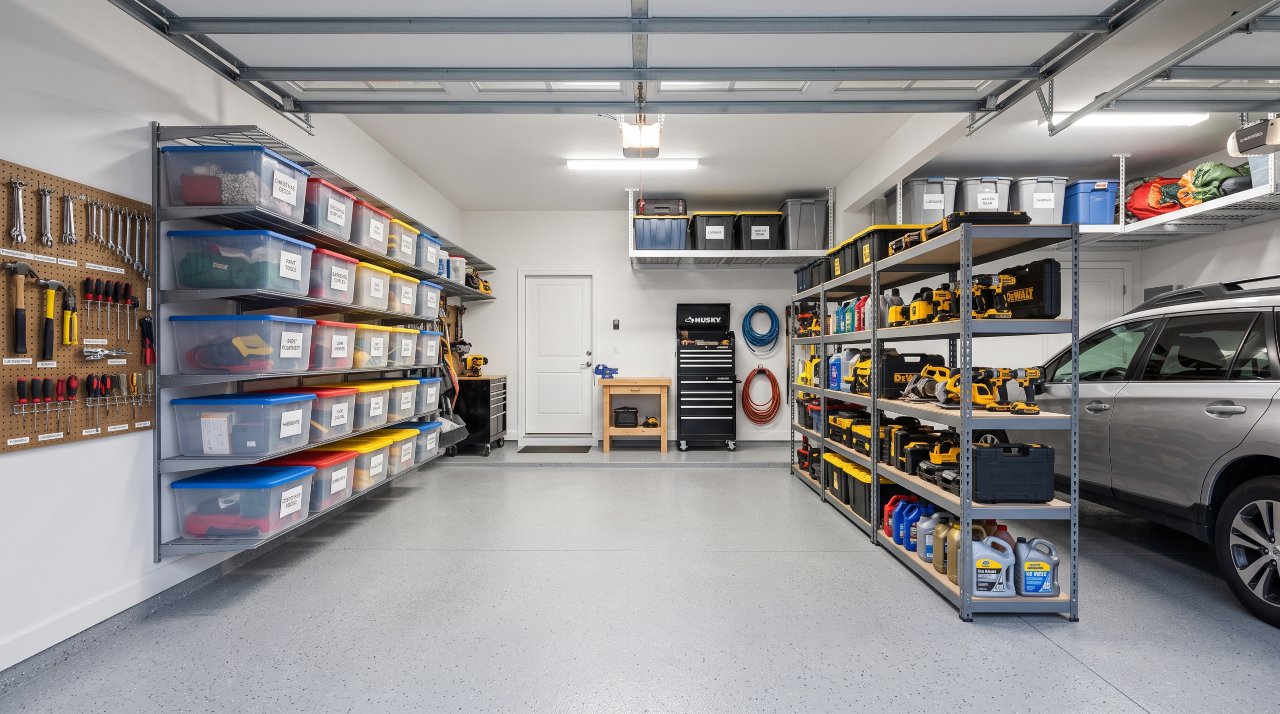
Pair wall-mounted heavy-duty shelving for frequently-used tools with overhead racks for seasonal items. This keeps your primary workspace at eye level while utilizing dead ceiling space for occasional-access storage. You’ll spend less time on ladders while maximizing total capacity.
Combine freestanding units with wall-mounted systems to create mobile storage zones. Keep lightweight freestanding shelves near your workbench for current projects, then roll them aside when you need floor space. Wall-mounted permanent shelving holds your core tool collection.
Use enclosed cabinets for small parts and open shelving for large items. Power tool accessories, screws, and hardware disappear on open shelves but stay organized in drawer systems. Reserve open shelving for bulky items like storage bins, automotive supplies, or sports equipment you need to grab quickly.
Install different shelf depths in the same garage. Use 12-inch shallow shelves for spray paint and automotive fluids where you need to see every can. Install 18-24 inch deep shelves in another area for storage bins and seasonal decorations. Matching depth to items prevents wasted space.
Add a mobile workbench with lower shelf storage to complement your fixed shelving. Roll it to your project location, access tools and supplies from the lower shelf, then return it to storage. This creates flexible workspace while maintaining organization.
The key is evaluating each item category separately. Sports equipment has different requirements than hand tools, which differ from automotive supplies. Match the shelving solution to the specific challenge rather than forcing everything onto identical shelves.
FAQ: Your Garage Shelving Questions Answered
What is the cheapest way to add shelving in a garage?
The cheapest functional option is cinder block and lumber shelving, costing $50-100 for an 8-foot section. Stack concrete blocks as supports and lay 2×10 boards across them. This requires zero tools and holds 200-400 pounds per shelf. Alternatively, watch for used kitchen cabinets at Habitat ReStore locations, where you’ll find garage-ready storage for $20-80.
How deep should garage shelves be?
Standard 16-18 inch depth works best for most garage storage. This lets you access items without removing everything in front while maximizing wall space. Use 12-inch shallow shelves for spray cans and automotive fluids where visibility matters. Reserve 24-inch deep shelves only for large storage bins or seasonal items you access infrequently.
What type of shelving is best for a garage?
Metal shelving offers the best combination of durability, weight capacity, and moisture resistance for most garages. Five-tier steel units costing $80-150 hold 200-350 pounds per shelf and last decades with minimal maintenance. Choose powder-coated steel in humid climates or plastic resin shelving if you’re storing chemicals that might corrode metal.
How much weight can garage shelves hold?
Weight capacity varies dramatically by construction. Basic bracket shelves hold 50-200 pounds per shelf depending on materials and bracket spacing. Industrial steel shelving handles 300-800 pounds per shelf when properly installed. Always check manufacturer specifications and reduce loads by 20% for safety margins. Remember that capacity assumes even weight distribution across the entire shelf surface.
Should garage shelves be wood or metal?
Metal shelving wins for durability, weight capacity, and maintenance in most situations. It won’t warp, resists moisture better, and handles heavier loads. Choose wood only when you need custom sizes for odd spaces, prefer the aesthetic, or you’re building built-in shelving matching your home’s style. Seal wood with polyurethane to prevent moisture damage in garage environments.
How do you maximize storage in a small garage?
Maximize vertical space first by using wall-mounted shelving from floor to ceiling and adding overhead racks. Install shallow shelving (12-16 inches deep) to avoid consuming floor space. Use corners with specialty corner shelving units. Add hooks and pegboards between shelving for additional item storage. Finally, evaluate what you’re storing—removing items that belong elsewhere or donating unused equipment creates instant space.
Take Action on Your Garage Storage Today
You now have the framework to choose garage shelving that fits your space, budget, and actual storage needs. The single most important takeaway is this: measure first, plan your zones, then select shelving types that match each zone’s specific requirements.
Start with one zone this weekend. Measure your available wall space, calculate what you need to store there, and install appropriate shelving for that area. You don’t need to organize your entire garage in one exhausting session. Progress beats perfection.
Choose your first shelving project based on your biggest pain point. If you can’t find tools, tackle the workshop zone. If seasonal items block your car, install overhead storage. If sports equipment creates daily chaos, start there. Small wins build momentum for bigger projects.
Your garage can become organized, functional space that actually serves your life. Pick one shelving idea from this guide and implement it this week. You’ll be amazed how much better your garage—and your daily routine—feels with just one organized zone completed

Callum Langham
Founder & Technical Storage Editor
Callum Langham is the founder and technical editor of Rack System. With over 12 years of hands-on field experience in warehouse logistics, garage organization, and industrial storage installations, Callum specializes in engineering safety standards, beam load calculations, and OSHA/RMI compliance. Every guide on Rack System is audited against verified steel gauge tolerances and municipal building codes.