The average American garage holds over $3,000 worth of tools, sports gear, and seasonal items — and most of it ends up on the floor. A garage track system promises to fix that, but if you’ve spent twenty minutes on Google trying to figure out what one actually is, you’re not alone.
The term “garage track system” gets used loosely. Sometimes it refers to a rail system with sliding hooks. Sometimes people mean slatwall and sometimes they mean a pegboard. Sellers use these terms interchangeably, which leaves you staring at a product page with no idea what you’re actually buying.
This guide clears all of that up. You’ll learn exactly how a garage track system works, how it differs from slatwall and pegboard, what weight you can realistically store on one, whether you need to drill into studs, and how to decide if it’s the right choice for your garage.
What Is a Garage Track System?
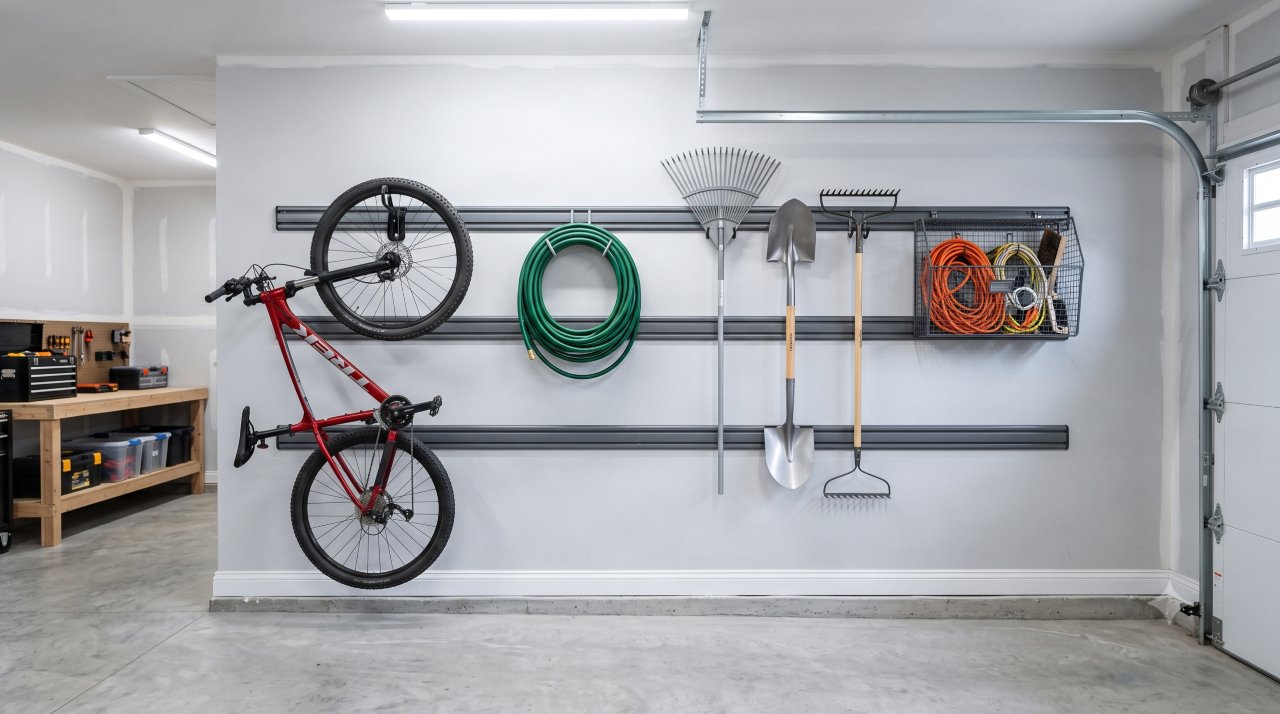
A garage track system is a wall-mounted storage solution built around horizontal metal or heavy-duty plastic rails that attach to your wall. You hang accessories — hooks, baskets, shelves, and brackets — directly onto those rails.
The defining feature is adjustability. Most systems use a channel or groove along the rail that lets you slide, reposition, or swap out accessories without drilling new holes every time you rearrange. That’s the core mechanical advantage over fixed shelving.
Think of the rail as a track on a curtain rod. The accessories ride along it and lock into place wherever you need them.
How a Garage Track System Actually Works
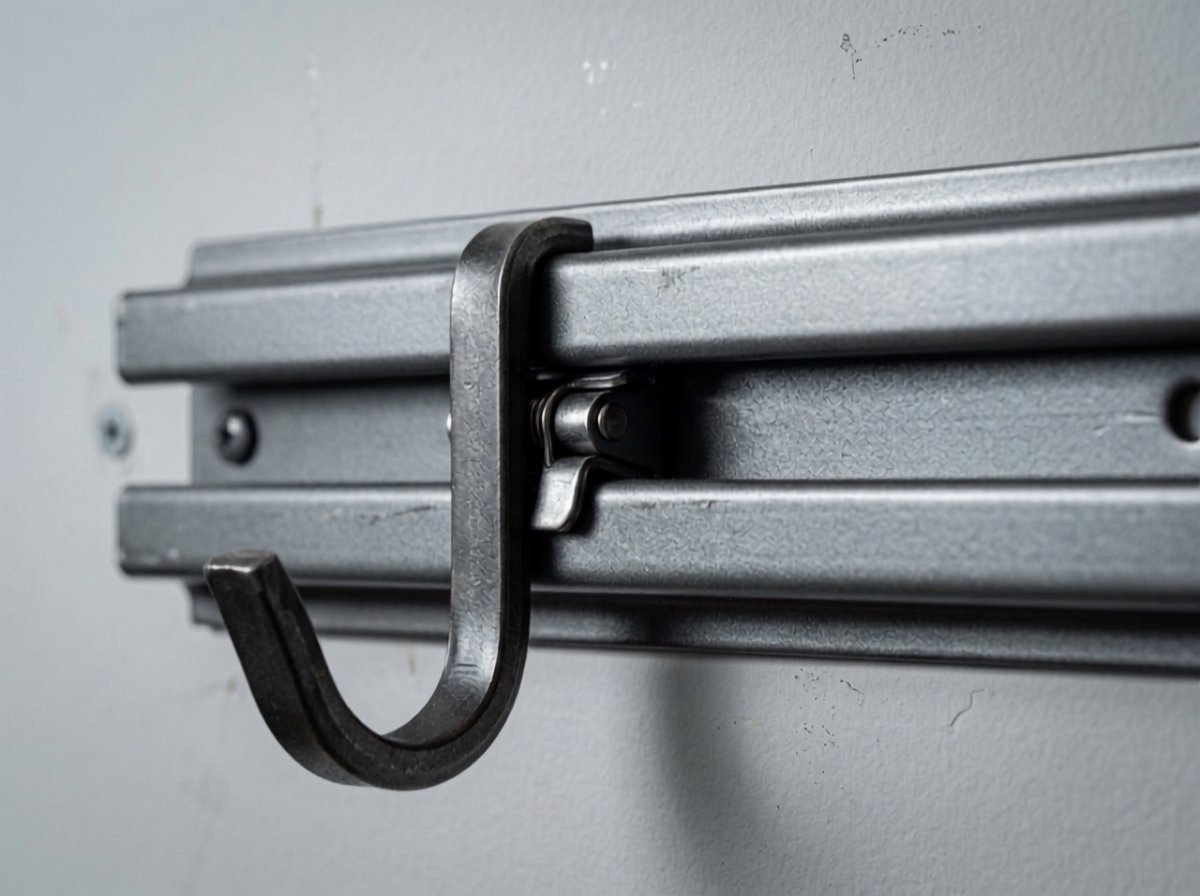
Here’s where most articles skip the important part. A garage track system has three main components working together.
The rails (tracks): These are horizontal bars, typically made from steel or reinforced polymer, that mount directly to your wall. They’re the backbone of the whole system. Rails commonly come in 4-foot, 6-foot, and 8-foot lengths.
The mounting hardware: Rails attach either to wall studs (the strongest option) or to drywall using heavy-duty anchors. More on that below — it matters a lot for weight capacity.
The accessories: Hooks, J-hooks, bike hooks, utility shelves, baskets, and hose hangers all clip or slide into the rail channel. When you want to move a hook, you slide it along the rail and lock it in the new position — no new holes required.
This sliding-and-locking mechanism is what separates a true track system from a simple wall-mounted bracket or a pegboard. Pegboard requires you to lift items in and out of fixed holes. A track system lets you reconfigure your layout in seconds.
Garage Track System vs. Slatwall vs. Pegboard
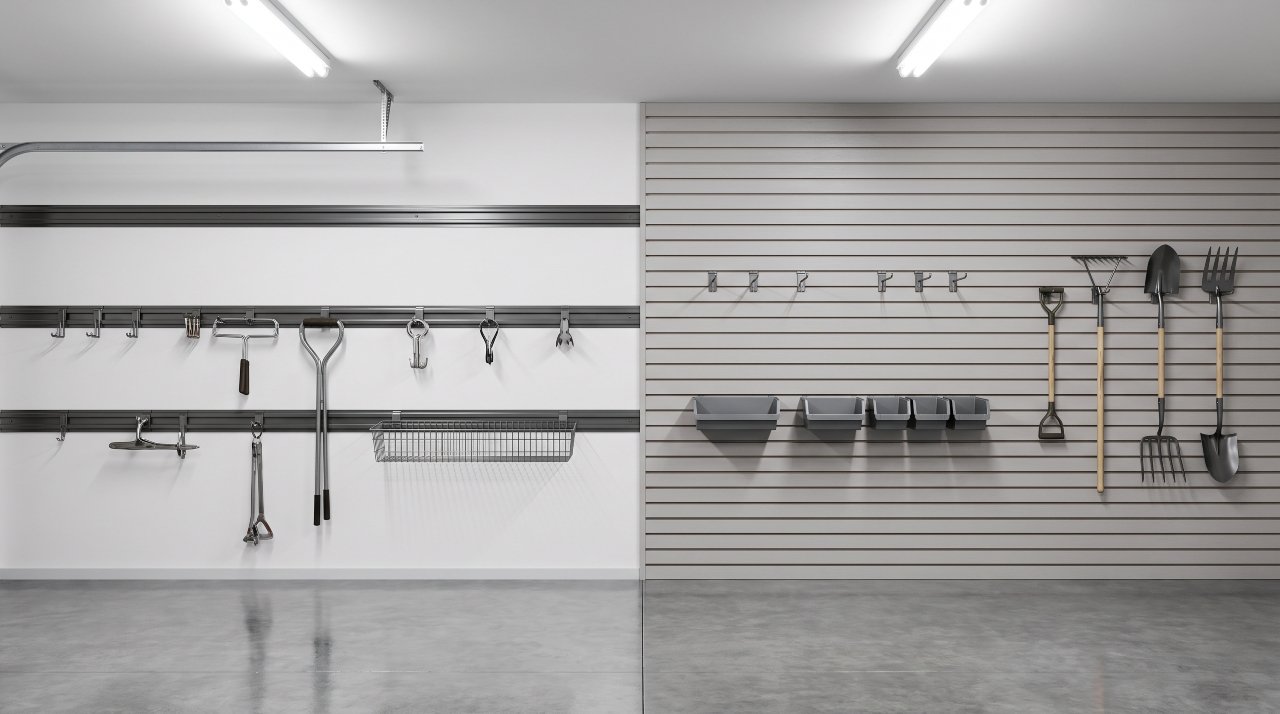
This is the question most beginners actually need answered. These three systems look similar in photos but work very differently.
| Feature | Track System | Slatwall | Pegboard |
|---|---|---|---|
| Material | Steel or polymer rails | MDF or PVC panels | Hardboard or metal |
| Accessory movement | Slides along rail | Slides along groove | Fixed hole positions |
| Typical weight capacity | 50–200 lbs per rail | 25–75 lbs per panel | 5–25 lbs per section |
| Installation complexity | Moderate (stud mount ideal) | Moderate (panel weight) | Easy (lightweight) |
| Moisture resistance | High (steel/polymer) | Low (MDF warps) | Medium |
| Cost range | $80–$400+ for a wall | $100–$500 for a wall | $30–$150 for a wall |
| Best for | Heavy tools, bikes, bulky gear | Lighter tools, retail-style display | Small hand tools, craft items |
The bottom line: If you need to hang a bicycle, store heavy power tools, or support significant weight on the wall, a track system outperforms both slatwall and pegboard. If you want a flexible display for lighter items and like the aesthetic, slatwall works well. For small hand tools and craft supplies, pegboard is the budget-friendly choice.
If you want to see how all these options fit into a bigger picture, check out this full garage storage guide covering 7 storage types and common buying mistakes.
Weight Capacity: What to Realistically Expect
Weight capacity is where most buyers get burned by vague marketing claims. Here’s what the numbers actually mean in practice.
A typical steel garage track system rail, properly mounted into wall studs, handles 50 to 200 pounds per rail depending on the rail gauge and stud spacing. Premium systems from brands like Rubbermaid FastTrack, Gladiator GearTrack, and Monkey Bars publish tested load ratings — not estimates.
According to testing published by Consumer Reports and independent hardware reviewers, a single 4-foot GearTrack rail mounted into studs supports up to 100 lbs distributed across multiple hooks. A single bicycle hook, properly mounted, handles 50–75 lbs on most rated systems.
The critical variable is how you mount the rail. A rail screwed into two wall studs is dramatically stronger than one held by drywall anchors. Drywall anchors typically reduce effective load capacity by 40–60% compared to stud mounting, even when using toggle bolts.
Real-world example: A homeowner in a standard two-car garage (24′ × 24′) with eight feet of track rail mounted into studs can safely store two bicycles, a set of garden tools, and a heavy bag of sports equipment — roughly 150–180 lbs total — across a single organized wall section.
According to the American Housing Survey data compiled by the National Association of Home Builders, garage storage upgrades rank among the top five home improvement projects US homeowners undertake, which explains why the market for garage organization systems exceeded $3.4 billion in 2025.
Do You Need to Mount Into Studs?
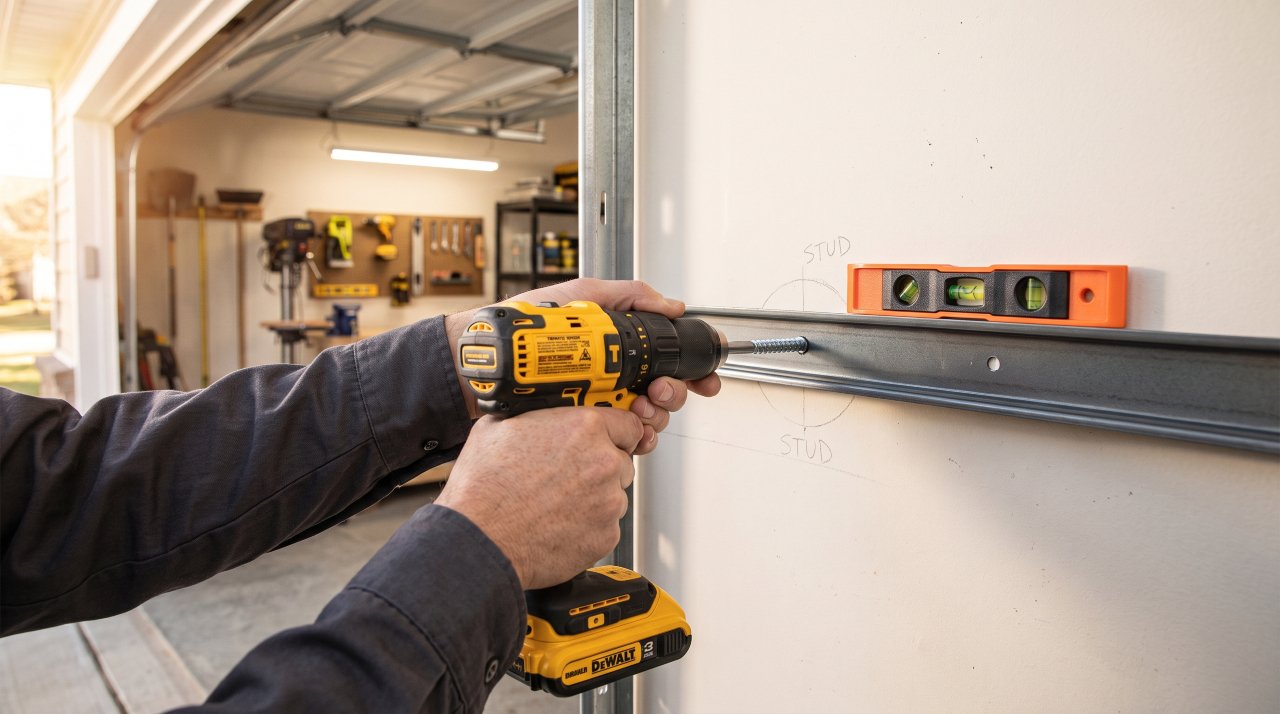
This is the question that causes the most anxiety for beginners — and it deserves a straight answer.
Yes, for anything carrying significant weight, you want studs. A wall stud gives you a solid wood anchor point (typically 2×4 or 2×6 lumber) that can handle shear force. Drywall alone cannot. If your rail pulls a drywall anchor loose under load, everything on it comes down.
Standard US homes have studs spaced 16 inches apart on center. You find them with an inexpensive stud finder (around $15–$30 at any hardware store) or by tapping along the wall and listening for a solid thud instead of a hollow echo.
Here’s what your options look like based on wall type:
Standard drywall over wood framing: Stud mount — straightforward, highest strength.
Concrete or block walls (common in basement garages): Use concrete anchors (sleeve anchors or Tapcon screws). Equally strong, slightly more drilling effort.
Metal stud framing (newer construction): Requires toggle bolts or specialized metal stud anchors. Load capacity is lower — plan for lighter storage configurations.
Most manufacturers’ installation guides, including those from Gladiator GarageWorks installation documentation, specify stud mounting as the required method for full rated load capacity.
Types of Garage Track Systems Available in 2026
Not all track systems are built the same. You’ll encounter three main configurations when shopping.
Single-rail systems: One horizontal rail with accessories hanging below. Rubbermaid FastTrack is the most recognized example. These are modular, easy to expand, and widely available at Home Depot and Lowe’s. Price point: $30–$80 per rail.
Multi-rail channel systems: Multiple parallel rails creating a larger organized wall section. Gladiator GearTrack and Monkey Bars use this approach. Better for large walls with diverse storage needs. Price point: $150–$400 for a full wall section.
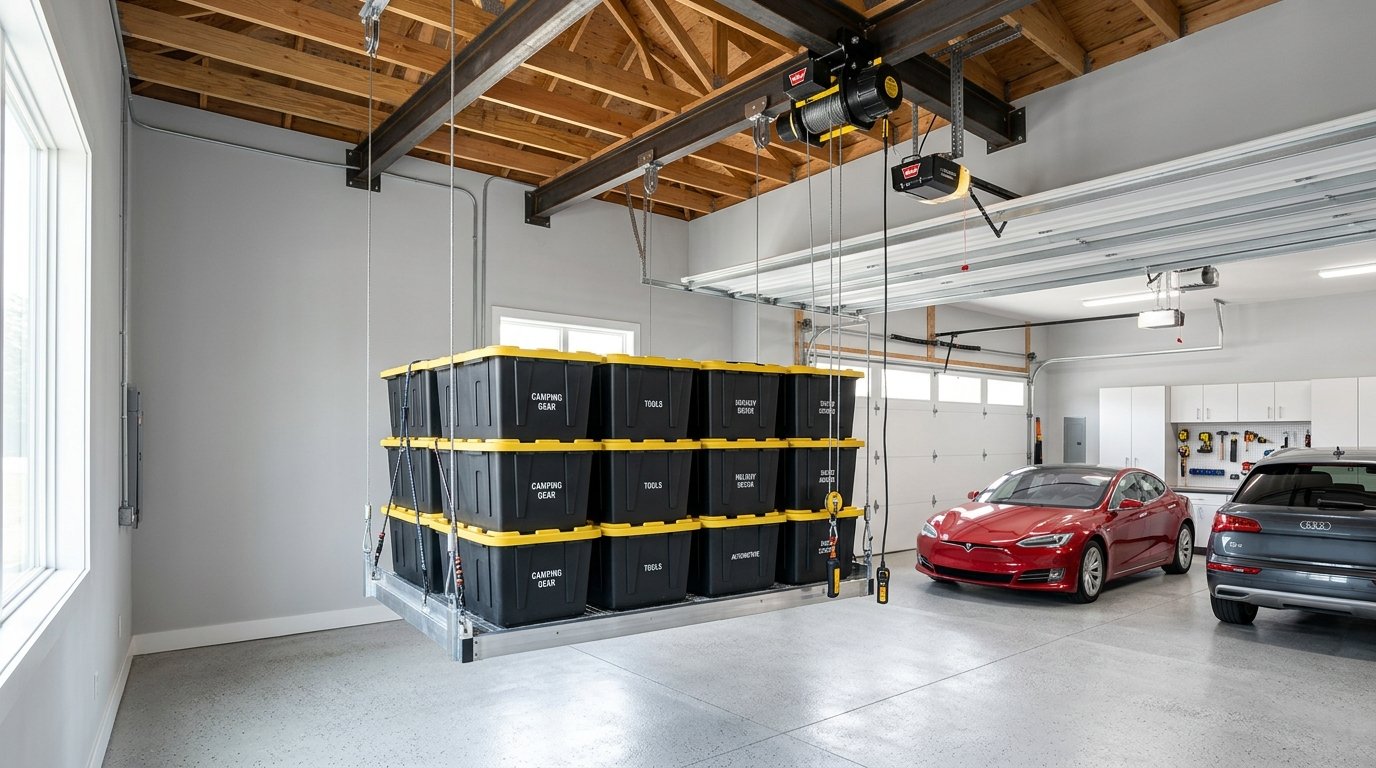
Overhead track systems: Rails mount to the ceiling joists rather than the wall, suspending storage above the car. These are a different product category entirely — better for seasonal bins and bulky items you rarely access. Don’t confuse these with wall-mounted track systems.
If you want to compare all garage storage options side by side, including overhead systems, floor-standing shelves, and wall units, that resource covers every major category available in 2026.
The Honest Downsides of a Garage Track System
You deserve a straight answer here, not just sales copy.
Cost adds up fast. A single starter rail kit is affordable at $40–$80, but fully outfitting a two-car garage wall with quality track, hooks, baskets, and a bike attachment can run $300–$600 or more. Budget accordingly.
Accessory compatibility isn’t universal. A Gladiator hook won’t always fit a Rubbermaid track. If you mix brands, you’ll run into fit problems. Pick one system and stick with it.
Installation takes real effort. Finding studs, leveling rails, and driving lag screws isn’t difficult, but it takes 2–4 hours for a typical wall section and requires a drill, a level, and a stud finder at minimum.
Rails don’t handle point loads well. If you want to hang one single very heavy item — say, a 100-lb safe or an industrial toolbox — a dedicated wall-mounted bracket or overhead hoist handles that better than a track hook.
Weight limits require honest self-assessment. Homeowners consistently overload track systems by ignoring the difference between total rail capacity and per-hook capacity. A rail rated for 100 lbs doesn’t mean every hook handles 100 lbs. Individual hook ratings are typically 20–50 lbs each.
For alternative approaches that avoid some of these constraints, look at wall-mounted alternatives — particularly fixed-bracket shelving that handles heavier concentrated loads.
Is a Garage Track System Right for Your Garage?
Use this quick decision check. If you answer yes to most of these, a track system is likely a strong fit.
You have a standard drywall wall with wood studs behind it. You want to store a mix of items — bikes, tools, sports gear — not just one category & you want to rearrange your storage layout without re-drilling. You’re storing items in the 5–75 lb range individually. You want a clean, organized look rather than open shelving or bins on the floor.
If you’re storing items heavier than 75 lbs each, dealing with concrete walls (still doable, just more work), or working with a very tight budget under $50, you might want to reconsider or look at supplementary solutions.
According to a Statista report on US home improvement spending, garage organization projects deliver some of the highest satisfaction rates among DIY home upgrades, with over 78% of homeowners reporting they’d repeat the project.
FAQ: Garage Track Systems Answered Clearly
What is a garage track storage system?
A garage track system is a wall-mounted storage solution using horizontal rails that hold adjustable hooks, baskets, and shelves. You mount the rails to your wall, then clip or slide accessories onto them. The key benefit is that you can reposition accessories without drilling new holes.
How much weight can a garage track system hold?
Most quality steel track systems hold 50–200 lbs per rail when properly mounted into wall studs. Individual hooks typically carry 20–75 lbs each depending on the manufacturer’s rating. Always check the specific weight rating for both the rail and the individual accessory — they’re different numbers.
Do garage track systems need to be mounted to studs?
For full rated weight capacity, yes. Mounting into studs gives you the strongest possible anchor point. You can use heavy-duty drywall anchors for lighter loads, but expect significantly reduced capacity — roughly 40–60% less than a stud-mounted rail. Concrete walls require concrete-specific anchors.
What is the difference between slatwall and a track system?
Slatwall uses wide MDF or PVC panels with horizontal grooves across the entire panel surface. A track system uses narrower individual rails. Slatwall covers more wall area but typically holds less weight. Track systems have higher weight ratings, better moisture resistance (especially in steel versions), and are more modular.
Are garage track systems worth the investment?
For most homeowners storing a mix of tools, bikes, and gear, yes. The ability to reconfigure your layout without re-drilling justifies the cost over time. The best value comes when you choose a system with widely available accessories so you can expand or swap components without being locked into high-priced proprietary parts.
How long does installation take?
For a beginner, expect 2–4 hours for a single wall section of 8–12 feet. That includes finding and marking studs, leveling and mounting rails, and hanging your first set of accessories. A second wall section goes faster once you’ve got the process down.
Your Next Step
The most important thing you learned here: a garage track system is defined by its sliding, repositionable accessories on a mounted rail — and it’s a meaningfully different product from slatwall or pegboard, not just a different name for the same thing.
If you’re ready to move forward, start by measuring your available wall space and listing every category of item you need to store. That list tells you which accessories you need, which tells you how much rail length you’re actually buying.
Pick one brand, stick with it for accessory compatibility, and budget for the drill, stud finder, and level if you don’t already own them. Your garage wall can handle it — and so can you.

Callum Langham
Founder & Technical Storage Editor
Callum Langham is the founder and technical editor of Rack System. With over 12 years of hands-on field experience in warehouse logistics, garage organization, and industrial storage installations, Callum specializes in engineering safety standards, beam load calculations, and OSHA/RMI compliance. Every guide on Rack System is audited against verified steel gauge tolerances and municipal building codes.